To propagate cactus pads, simply remove a mature pad, let it dry for a few days, then plant it on well-draining soil. Lay the pad flat on top of the soil and wait for roots and new growth to appear. It’s a simple and effective way to grow new cactus plants.
Propagating your own cacti is not only fun, but it can also be a great way to save money. Plus, you get the bonus of knowing how to take care of your cacti from start to finish.
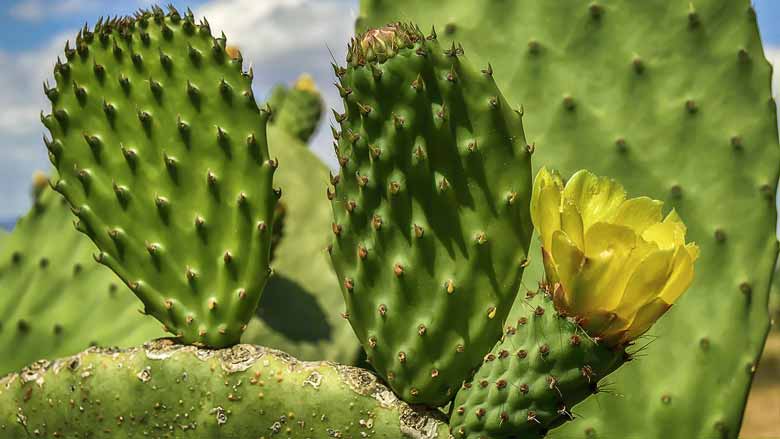
Cactus varieties like the Opuntia, also known as the Prickly Pear Cactus, are popular choices for propagation using pads. Prickly Pears are known for their flattened, oval-shaped pads, making them a suitable choice for propagation through this method.
Other types of cacti, such as columnar or globular varieties, may not be as suitable for propagation through pads, as their shape does not lend itself to this method.
A cactus pad is essentially a modified stem of the cactus plant. It contains enough nutrients and moisture to develop roots and new growth.
Do you want to learn how to propagate cactus pads? Cactus propagation is a simple process that anyone can do with just a few simple steps.
It’s easy to propagate cacti and succulents, but you should know some essential things before you start.
In this article, we will discuss the process of propagating cactus pads and provide you with all the information you need to get started.
When Should You Propagate Cactus Pads?
With so many varieties of cacti available, it is important to consider the specific needs of each species when deciding when to propagate them.
Ideally, this should be done during the active growing season, typically in late spring or summer for most cacti.
Propagating cacti during the active growth season ensures that your plant has enough time to develop a strong root system before winter arrives.
On the other hand, it’s crucial to avoid propagating cactus pads during their dormancy period, especially when there’s frost or the temperature drops below freezing.
The reason for this is that the plant will not be actively growing, and therefore, it will not have enough energy to produce new roots or experience further growth.
Furthermore, during the dormancy period, cacti are particularly sensitive to diseases.
Additionally, you should refrain from propagating cactus pads if the plant is showing any signs of distress, such as wilting or shriveling up.
It’s best to wait until the plant has recovered before propagating it.
How Do You Propagate Cactus Pads?
Propagating cactus pads is a great way to increase your plant collection without having to wait for them to grow from seeds.
This type of propagation, similar to leaf and stem propagation, entails taking a segment of an existing plant and using it to establish a new one. It proves to be an effective and efficient method for expanding the variety of plants in a garden.
Moreover, it’s an enjoyable project that can be relatively easy to complete.
Here is a step-by-step guide on how to propagate cactus pads:
1. Choose the Right Pad Cuttings
Not all cactus pads are created equal – some will be easier to propagate than others.
Make sure you select healthy cactus cuttings from a Prickly Pear Cactus that hve plenty of growing tissue.
The best pads are firm and pliable, with a healthy green color. Avoid any cactus cutting with brown or black spots on them, which may indicate disease.
If the pad is too soft or mushy, it could mean it’s overripe and no longer viable for propagation purposes.
2. Remove From the Plant
Once you have chosen a suitable cactus pad, it’s essential to remove it from the mother plant carefully.
The best way to do this is by using a sharp knife or scalpel and gently cutting through the base of the cactus pads close to where they meet with another part of the plant body (usually at an angle).
You will need to make a clean cut, so try to avoid crushing or damaging any tissue surrounding it.
Do not pull on the pad, as this may cause damage and prevent successful propagation from occurring.
3. Remove the Spines and Clean It
The next step is to remove any spines on your cactus pad. You can do this by using a pair of pliers or tweezers.
Be very careful when doing this, as you don’t want to damage the pad in any way.
Once all of these have been removed, you will need to clean up any remaining dirt that might be present before propagation begins.
To do this, you can use a soft brush or cloth.
4. Let the Pad Callus Over for a Few Days
Now that your cactus pad is clean and ready to go, you will need to let it callus over for a few days.
It might take between three days and a week or more to complete the procedure, depending on the size of the pad.
Allow the exposed portion of the cut to breathe. While drying, keep it away from direct sunlight.
This is an important step as it allows the cut surface to dry out and form a protective layer over the tissue.
If this doesn’t happen, there is a greater risk of bacteria or fungus invading and causing damage to the plant.
5. Preparing the Pot with Suitable Soil
Before you can plant your cactus pad in its new home, it’s important to prepare a pot with soil.
Choose a container that is large enough to accommodate the cactus pad. Make sure the pot has a drainage hole at the bottom so that any excess water can escape.
Fill the pot with a well-draining potting mix, such as cactus soil, or a mix with sand and perlite. This will help keep the soil healthy and prevent it from becoming waterlogged.
Ensure there are no weeds in your potting mixture, as they may compete for resources when growing roots on the pad.
6. Place the Pad on Top of the Soil
Once you have prepared a pot with soil, it’s time to place the cactus pad on top of it.
Ensure the pad remains in contact with the soil, but don’t bury it. You just need to lay the pad flat on the soil surface.
Don’t stand the pad upright, as it may not be able to stay in place for very long.
You may also decide to add rooting hormone to the cut base of the pad before placing it on top of the soil to promote root growth.
7. Providing Adequate Watering
Give the cactus pad a good watering and mist it daily to keep the soil moist for the first few weeks. This will help the pad to establish roots and start growing faster.
Check the soil regularly to make sure it hasn’t dried out too much or gotten waterlogged from overwatering.
After a few weeks, you can taper off and only water it when the top inch or so of soil feels dry to the touch.
Too much water can damage the cactus pad, so make sure not to overwater it.
8. Place in a Bright Spot
Place the cactus plant in a bright spot where it will receive indirect sunlight.
The plant will need light to grow properly but keep the cactus out of direct sunlight as this can cause the pad to overheat and dry out.
A spot near a window is perfect, but make sure to move it if the spot becomes too hot.
If you live in a hot climate, then make sure to move the cactus pot to a shady spot to protect it from the intense temperatures.
This will help keep the soil moist and prevent it from drying out too much.
9. Wait for New Roots to Form
It will usually take a few weeks for new roots to start forming on the cactus pad.
You need to make sure that the soil doesn’t dry out too much or get waterlogged from overwatering during this time.
Reduce watering and let the soil dry out before watering again once the roots have been established.
It will take a few months for the cactus pad to become fully established and ready to be transplanted into its final home.
10. Transplant Into a Larger Container or Garden
Once the plant has become established and grown a few new roots, it’s time to transplant it into a larger container or the garden, where it can benefit from the sun, water, and nutrients it needs to continue to grow and thrive.
Prepare the ground with a mixture of soil, compost, and fertilizer. Fill the pot with the mixture and level it off, ensuring that the soil is firmly packed down so the plant can be planted at the same level as the ground.
Choose a pot that is at least twice the size of the original pot and about one inch larger than the plant itself.
Ensure the pots have drainage holes at the bottom, allowing any excess water to escape.
Fill the pot with cactus potting soil and plant the propagated cactus pad.
After planting the propagated cactus pad in the pot filled with cactus potting soil, make sure to leave a few inches of space at the top of the pot so that any excess water can escape. Water the soil lightly to ensure successful planting.
Ensure that all of its roots are in contact with the soil. Firm the soil around the plant, then water it thoroughly.
Place the newly established plant in a bright location with plenty of indirect sunlight.
Water sparingly, allowing the soil to dry out between waterings.
Cacti are slow-growing plants, so be patient if you notice the new plant growing slowly.
Final Thoughts
Cacti, with their characteristic flowers, are a great way to bring a bit of the outdoors into your home. Propagating cactus pads is an excellent method for expanding your collection of houseplants without having to purchase new ones.
Knowing how to propagate cactus pads is essential for any cactus lover.
The process is straightforward, and once you’ve mastered it, you’ll be able to grow new cacti from pads taken from your favorite plants.
Similar to propagating succulent leaves, propagating cactus pads can be a rewarding and enjoyable activity for plant enthusiasts. The ability to create new cacti from cuttings not only expands your collection but also allows you to share these beautiful plants with others.
By gaining hands-on experience in propagating cactus plants, gardeners can learn the process and how to care for their new plants in a more meaningful way than simply reading about it in a book or online. This makes it an incredibly rewarding and educational experience.
Just remember, when propagating cactus plants, it is important to wear gloves to protect your hands from any potential irritants or sharp edges, as well as to prevent transferring any bacteria or fungi from one plant to another.
Related Content
 How To Take Care of Small Cactus Plants (Mini Cactus Care Guide)
 How Often Should You Water a Mini Cactus (A Complete Guide)
 How Often Should You Water a Cactus (A Complete Guide)
 How To Grow Cactus From Cuttings (A Complete Guide)
 How to Transplant a Cactus (An Easy and Complete Guide)
 How To Trim a Cactus Plant (An Easy Step-by-Step Guide)