Key Takeaways:
- Haworthias can be propagated through offsets, leaf cuttings, or seeds. Offsets are the easiest method for beginners.
- Allow offsets to mature before removing them from the mother plant. Make clean cuts and let callous before replanting.
- For leaf cuttings, cut a healthy leaf and let it be callous before planting in or laying on the soil.
- Seeds can be collected or purchased but require more patience and ideal germination conditions.
- Provide proper care, including light, temperature, humidity, soil, water, and fertilizer for new propagates.
- Troubleshoot issues like overwatering, underwatering, and pests. Adjust care accordingly.
- Great haworthia varieties for propagation include H. attenuata, H. limifolia, H. retusa, and H. cooper.
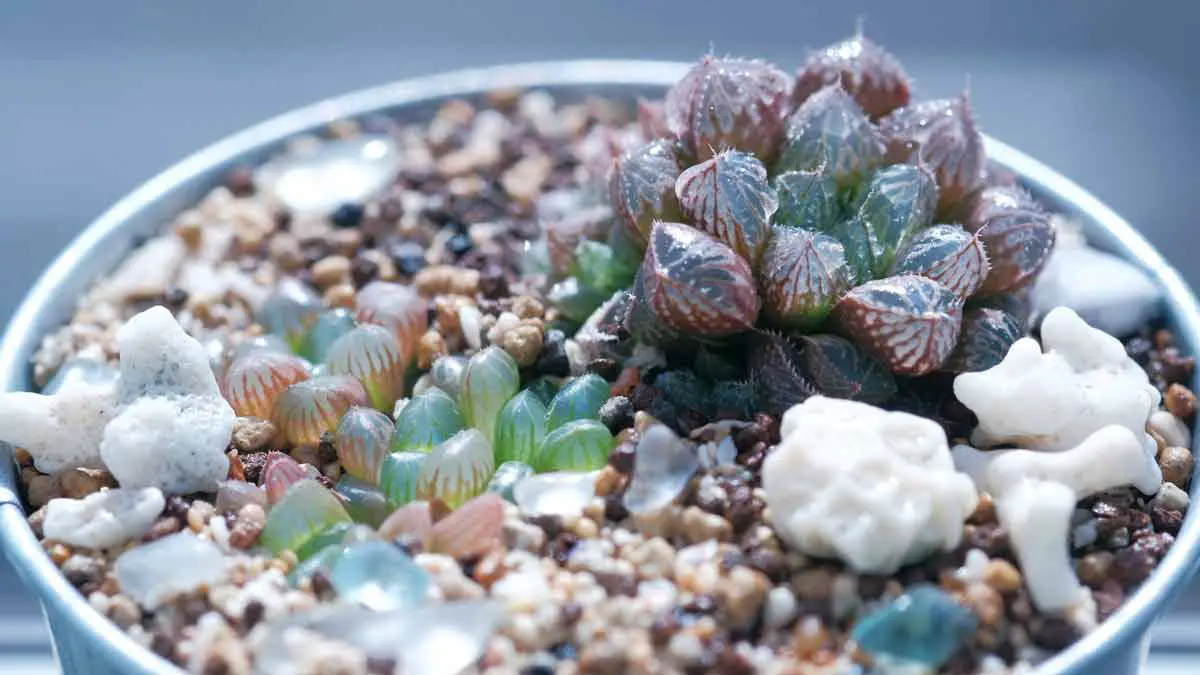
With their petite rosettes and intricate leaf patterns, it’s no wonder haworthia succulents are coveted additions to any plant collection.
The best part about these charming little plants? They’re one of the easiest succulents to propagate at home.
Whether you want to expand your haworthia collection or have some babies to share with fellow plant lovers, propagating your own is fun and rewarding.
In this comprehensive guide, we’ll walk through everything you need to know about propagating haworthia succulents. Let’s get started!
Haworthia Propagation Methods
Propagation is the process of creating new plants from cuttings, offsets, seeds, or other plant parts.
For succulents like haworthia, the most common propagation methods are through offsets and leaf cuttings.
Offsets are essentially “baby” plants that form around the mother plant.
Propagating with offsets allows you to multiply your collection while preserving the genetic lineage of your plants.
On the other hand, leaf cuttings create brand new plants with distinct characteristics.
Both methods are great options for haworthia propagation.
No matter your chosen method, propagating your plants is a fantastic way to expand your succulent collection without spending a dime.
Propagating with Offsets
Offset propagation takes advantage of the natural growth process of haworthia plants.
As they mature, many haworthia varieties will form small offsets (also called pups, offshoots, or plantlets) around the base of the parent plant.
These offsets have their roots but are still connected to and receive nutrients from the parent plant.
Here’s how to propagate haworthia through offsets:
First, allow the offsets to grow until they have their own established root system and several leaves.
It’s best to wait until they are at least 1/3 to 1/2 the size of the mother plant.
This ensures the haworthia pup is mature enough to survive on its own. Gently wiggle and loosen the potting soil around the offset’s roots to make removal easier.
Then, use a sterile knife or pruning shears to sever the offset as close to the mother stem as possible.
Make clean, smooth cuts rather than ripping or tearing the succulent plant material. Damaged tissue can allow disease or pests to gain access.
Carefully remove the offset and allow the cut to be callous for a day or two before planting.
Callousing seals the wound and helps prevent any rot or infection.
Once calloused over, plant the offset in a pot with a well-draining cactus or succulent soil mix.
Clay or terracotta pots work well, allowing air to circulate around the roots.
Choose a pot that is 2-4 inches larger than the offset. This will provide room for growth without leaving it swimming in too much soil.
Water sparingly at first, just enough to settle the soil around the new roots.
Then let the soil dry out completely before watering again. Gradually increase watering frequency over 4-6 weeks as the new plant establishes itself.
And voila! You’ve successfully propagated a brand new haworthia succulent from an offset.
Propagating Haworthia with Leaf Cuttings
Certain haworthia varieties can also be propagated from just a single leaf!
This fun method allows you to multiply your succulents without dividing the mother plant.
Here’s how it works:
Start by selecting a healthy, fully formed leaf from the lower part of the plant.
Try to retain some of the stem tissue at the base of the leaf, as this is where new growth will emerge.
Using sterile shears, cut as close to the stem as possible.
Allow the cut end to callous over for a day or two before planting.
Callousing prevents moisture loss and seals up the wound.
Next, you have a couple of options for planting the leaf:
- Bury the lower 1/3 of the leaf in a well-draining soil mix, keeping the remainder of the leaf exposed. The top of the leaf will photosynthesize, while the buried end will generate roots.
- Or lay the leaf horizontally on top of the soil. Haworthia leaves eventually sprout roots from their undersides and form a tiny new rosette where the original leaf meets the soil surface.
I prefer the horizontal method as it allows you to monitor progress and root growth without unearthing the leaf.
After planting, water is enough to moisten the soil without saturating it.
Mist occasionally to provide humidity. In low humidity, the leaf can dry out quickly.
Be sure the leaf-cutting doesn’t dry out completely but also avoid overly wet soil.
Tiny white roots will emerge from the cut end or leaf underside in a few weeks.
Soon after, a brand new succulent plantlet will begin forming.
Once several leaves have grown, you can treat it like a mature plant. Propagating from leaves is super cool!
Growing Haworthia from Seeds
A third yet more challenging way to propagate haworthia succulents is from seeds.
Collect seeds from spent flower stalks or purchase them from online vendors.
Start by sowing seeds shallowly in a sandy, well-draining potting mix.
Create small furrows or indentations for the seeds rather than sprinkling them atop the soil.
This helps protect the seeds and provides better moisture control.
Maintain warm temperatures around 70-80°F and keep the soil lightly moist.
I like to cover seed trays with plastic wrap or a humidity dome to create a greenhouse effect during germination.
Depending on variety and conditions, Haworthia seeds can take weeks or even months to germinate.
Be sure the soil never dries out completely.
Once seedlings emerge, remove any coverings and provide ample light to prevent excessive stretching.
When plants are large enough, transplant them into individual containers.
With the proper care, patience, and ideal conditions, you’ll eventually have new mature haworthia plants grown from seeds!
Optimal Conditions for Successful Haworthia Propagation
Creating new haworthia plants is fun, but you’ll need to give them some extra TLC for the first few months.
Here are some critical tips for caring for newly propagated haworthias:
1. Lighting
Provide bright indirect light to encourage growth without scorching tender new leaves.
East or west-facing windows are perfect.
Slowly acclimate plants to increased light levels over 7-10 days.
2. Temperature & Humidity
Maintain warm temperatures around 70-80°F to spur root growth after propagation.
Cooler temps can stunt growth. Haworthias prefer 40-50% humidity or lower to prevent rot issues.
3. Soil & Drainage
A gritty, well-draining cactus/succulent soil mix is critical.
Always use pots with drainage holes and avoid waterlogged soil.
4. Watering
Water sparingly at first with a light misting, then slowly increase frequency as plants establish.
Allow soil to dry between waterings.
5. Fertilizer
Wait 4-6 weeks before applying a diluted balanced fertilizer during the growing season.
Too much fertilizer can burn new plants.
6. Transplanting
Repot in a container 2-4 inches larger when the haworthia succulents outgrow their pots or become rootbound.
Avoid overpotting.
7. Hardening Off
Gradually expose propagated plants to increased sunlight and outdoor conditions over 7-10 days before leaving outside permanently.
Prevent sunburn!
Troubleshooting Common Propagation Problems
While haworthia propagation is fairly straightforward, running into an occasional hiccup is normal.
Here are some common issues and how to address them:
- Overwatering. Yellow, translucent leaves, soft rotting stems, or foul odors indicate too much moisture. Allow plants to fully dry out before watering less frequently. Provide more airflow.
- Underwatering. Shriveling, wrinkling, or dried-out leaves mean your plant needs more regular watering. Slowly increase frequency while ensuring drainage remains adequate.
As you gain some propagation experience, you’ll become adept at adjusting to keep your new plants happy and healthy.
Don’t get discouraged by a few setbacks along the way. It’s all part of the learning process.
Best Haworthia Varieties for Propagation
Most haworthia species readily propagate from offsets, while some also take well from leaf cuttings.
Here are some great choices for beginning propagators:
- Haworthia attenuata – Fast-growing offsets and prolific leaf propagators. The popular “zebra” haworthia.
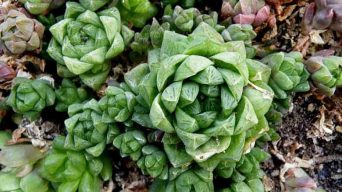
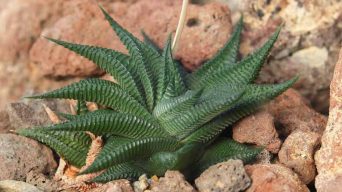
- Haworthia limifolia – Produces offsets and can be propagated from leaves. Distinctive spiral leaf growth.
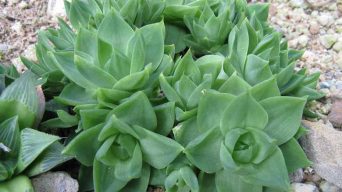
- Haworthia retusa – Easy to propagate pups. Leaves can propagate but are less efficient.
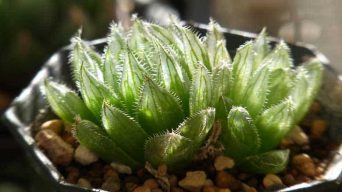
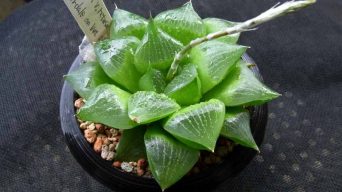
- Haworthia cooperi – Reliably forms offsets suitable for division. Interesting raised white bumps on leaves.
Remember, your propagation possibilities are endless when you select healthy parent plants that exhibit desirable traits like vibrant leaf color and pattern variations.
Seek out the weird and wonderful haworthias to expand your collection.
Equipping Your Propagation Station
Having the proper propagation tools and supplies will set you up for success:
- Small, sterilized pruning shears or knife for making clean cuts
- Assortment of pots/containers for planting offsets and leaf cuttings
- Seed trays, cells, or starter pots for seed propagation
- Rooting hormone powder or gel (optional but can speed up rooting)
- Labels and markers for keeping newly propagated plants organized
- Suitable propagation substrate such as cactus/succulent soil mix
- Rooting tray, humidity dome, or plastic greenhouse for maintaining moisture (optional but very useful!)
Final Thoughts
Hopefully, this guide has shed some light on the beautiful world of haworthia propagation.
Growing new plants from leaves, offsets, or seeds is extremely rewarding when done correctly.
Trust me, once you get hooked on propagating, you’ll search for more haworthias at plant swaps and sales to propagate even more!
In my experience, the “pups” method is the easiest approach for any beginner.
Be patient, allow those offsets to mature, and soon you’ll have haworthia babies galore.
If you’re feeling adventurous, give leaf cuttings a try too. With a little trial and error, you’ll also get the hang of that.
As your propagation skills improve, don’t forget to share the wealth!
Pass along extras to fellow succulent lovers… propagation is always better when you spread the plant joy.
Related Content
 Haworthia Cooperi Care and Propagation (A Complete Guide)
 Haworthia Obtusa Care and Propagation (A Complete Guide)
 Haworthia Cymbiformis Care & Propagation (A Complete Guide)
 Haworthia Limifolia Care and Propagation (A Complete Guide)
 Haworthia Coarctata Care and Propagation (A Complete Guide)
 Haworthia Retusa Care and Propagation (A Complete Guide)