
Hydrangeas are susceptible to root rot, which causes brown discoloration in the roots, crown, and stem. Phytophthora spp. and Pythium spp. are common causes. Sanitation, cultural practices, and fungicides can prevent and treat the disease. Good water management is crucial. Nutrient-rich soil can also help avoid rot.
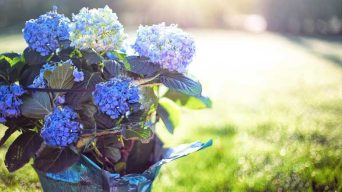
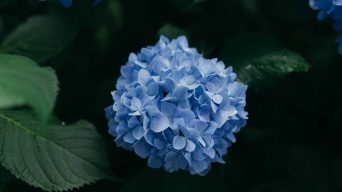
Hydrangeas, known for their lush foliage and stunning blooms, are a cherished addition to any indoor or outdoor space.
Yet, these beautiful plants are susceptible to a common ailment caused by the soil-borne fungus Phytophthora, known as root rot.
This condition impacts nearly all hydrangea varieties, particularly those grown in containers, such as the oakleaf hydrangeas.
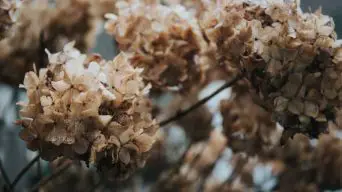
Unchecked root rot leads to symptoms like yellowing and wilting leaves, a decline in overall health, and, ultimately, the plant’s demise.
However, you can rescue your hydrangea from this damaging disease with prompt recognition and the right control measures.
This guide will take you through the crucial steps for identifying and managing root rot, ensuring your hydrangea remains vibrant and flourishing for years.
What Is Root Rot?
Root rot is a destructive plant disease that primarily affects the roots of hydrangeas, causing them to decay and ultimately leading to the death of the plant.
It is caused by various oomycetes, such as Phytophthora spp. and Pythium spp., waterborne fungal-like microorganisms capable of infecting plants under wet conditions.
A prevalent challenge among gardeners and plant enthusiasts, this condition often begins inconspicuously but can rapidly progress if not addressed.
Causes of Root Rot in Hydrangeas
Root rot in hydrangeas is mainly attributed to fungal infections by Phytophthora spp. and Pythium spp., flourishing in water-saturated or inadequately drained soils.
This condition is exacerbated by bacterial pathogens and pests that can further compromise the plant’s health, creating a more complex problem for gardeners to address.
Excessive watering, poor drainage, or situating hydrangeas in areas susceptible to dampness can foster conditions ripe for fungal proliferation.
Moreover, incorrect planting practices also play a role in facilitating this condition.
Specifically, burying hydrangeas too deeply can restrict airflow around the roots, creating an ideal environment for these detrimental fungi to thrive and spread.
Symptoms Of Root Rot On Hydrangea Plants
Root rot in hydrangeas is a widespread issue that gardeners encounter. Early identification of its symptoms is crucial for preventing significant plant harm.
Wilting, characterized by droopy leaves and stems despite sufficient watering, is one of the earliest and most noticeable signs of this condition. The absence of vibrant flowers, a hallmark of healthy hydrangeas, can also indicate underlying root issues.
Another indicator of a problem is the yellowing of leaves, suggesting root distress. This yellowing may eventually lead to the leaf’s edges turning brown, indicating that the plant cannot take up the necessary nutrients and water due to damaged roots.
Upon closer inspection, more severe signs appear at the plant’s base, including brown and mushy roots, signaling a fungal attack exacerbated by excessively moist soil.
In certain instances, a visible white fungus may appear below the soil surface, or black fungal spores may be found on affected roots.
To effectively combat this problem, gardeners must vigilantly monitor these symptoms, enabling prompt intervention to salvage their valued hydrangeas from this destructive ailment.
How To Detect And Diagnose Root Rot in Hydrangeas
Detecting and diagnosing root rot in hydrangea plants is crucial for several reasons.
First, catching the infection early on can prevent it from spreading to other plants.
Rot is highly contagious and can quickly infect healthy plants growing nearby.
Second, treating rotting roots promptly increases the chances of saving your hydrangea plant.
One common sign is wilting and yellowing leaves, which could eventually cause them to fall off.
Other symptoms include stunted growth, stem discoloration, blackened roots, or a foul odor emanating from the soil around the base of your plant.
Inspecting the Roots for Signs of Rot
Inspecting the roots of your hydrangea plant is an essential step in detecting and diagnosing root rot, a condition where the roots become infected and begin to deteriorate.
Here are some steps to follow:
- Carefully dig around the base of the plant using a trowel or shovel.
- Check for any signs of discoloration, such as brown or black roots.
- Look for any mushy or rotten roots that may be present and remove them with sharp scissors or pruning shears.
- Inspect the root ball for any signs of damage, such as a lack of healthy roots, which can be caused by overwatering or poor drainage.
- If you find any signs of rot, treat the plant immediately to avoid further spread.
Remember that healthy roots should be firm and white, with no signs of rot or discoloration.
Regularly inspecting and maintaining your hydrangea plants will help keep them healthy and free from diseases.
Assessing Soil Moisture and Drainage
Checking the moisture content and drainage of the soil is vital in detecting and diagnosing root rot in hydrangea plants.
Here are some steps that you can take to test your soil:
- Get a soil moisture meter: You can use a soil moisture meter to determine how wet or dry your soil is. Insert the probe into the soil near the roots, and check the reading on the display.
- Check for waterlogging: If you see that the soil is waterlogged, it means there is poor drainage. You can check this by observing if water drains away from the plant after watering or if it pools around the base of the plant.
- Conduct a percolation test: Dig a hole about 12 inches deep and fill it with water. Check how long it takes for the water to drain out completely. If it takes longer than 30 minutes, then your soil has poor drainage.
- Inspect roots: Carefully inspecting the roots for signs of rot is also crucial in detecting and diagnosing root rot on hydrangea plants. To do this, gently remove some soil around the roots and examine them closely for any brown, mushy, or soft areas.
Effective Treatment Strategies
The beauty of hydrangeas can be a sight to behold, but root rot can easily compromise their health.
A careful approach is required to tackle this issue, thoroughly removing affected areas, meticulous soil management, and strategic use of fungicides.
Begin by delving into the treatment of root rot to rejuvenate your plants.
1. Removing Affected Areas
If your hydrangea is suffering from root rot, you must take immediate action to remove the affected areas. Here are the steps:
- Use a garden fork or trowel to carefully dig around the plant’s base and expose its roots.
- Look for signs of decay or blackened roots.
- Using sharp pruning shears, remove all damaged roots, leaving only healthy white roots intact.
- If necessary, trim back the foliage on the plant to compensate for root loss.
- After removing the affected areas, replant your hydrangea in fresh, well-draining soil that has been amended with organic matter.
- Water your plant thoroughly, but avoid overwatering it in the future.
2. Adjusting Soil PH And Fertilizer
Ensuring the right soil pH is crucial for keeping hydrangeas healthy and avoiding root diseases.
Hydrangeas thrive in slightly acidic soil, with an optimal pH of 5.5 to 6.5.
Using a balanced, slow-release fertilizer can support their growth while also helping to stave off root issues.
However, it’s important to avoid over-fertilizing, as doing so can result in excess salt accumulation in the soil, putting additional stress on the plant’s root system.
Fertilization should ideally occur early in the growing season and be halted post-mid-summer, aligning with the plant’s reduced growth phase.
3. Improving Drainage
Enhancing drainage is key to further safeguarding hydrangeas against root decay.
Waterlogged soil can create a perfect environment for fungus and disease to develop, causing damage to the roots and ultimately killing the plant.
Consider using well-draining soil with added organic matter or creating raised beds to improve drainage.
Removing excess water from the soil is critical in preventing root rot, but be careful not to let the soil dry out completely, either.
A moisture meter can help you determine when it’s time for watering without risking overwatering your plants.
Also, avoid planting hydrangeas, where water collects after rainfalls or irrigations.
4. Using Fungicides
Applying fungicides can address root rot in your hydrangea plant.
Fungicides work by killing or suppressing the fungi responsible for the problem.
Systemic fungicides, which the plant absorbs, offer enduring defense against subsequent infections.
They are frequently utilized as a preventative strategy before the appearance of any symptoms.
It’s crucial to recognize that various fungi necessitate distinct treatments, making accurate identification of the fungus essential before using a fungicide.
Preventing Root Rot in Hydrangea
Preventing root rot on Hydrangeas involves proper planting techniques, keeping the soil moist but not wet, monitoring soil pH and fertility, and regular maintenance and monitoring.
With these tips, plant owners can keep their hydrangeas healthy and thriving for years.
1. Proper Planting Techniques
To avoid root rot in hydrangeas, ensuring proper planting is crucial.
Here are some tips:
- Choose the right soil: Hydrangeas grow best in well-draining soil with a pH range of 6.0 to 7.5. Avoid planting in heavy or clay soils that retain too much moisture.
- Improve soil drainage: If your soil is heavy or poorly draining, amend it with organic matter like compost or peat moss to improve drainage.
- Plant at the appropriate depth: When planting hydrangeas, be sure to plant them at the same level they were growing in their container. Don’t bury the stem or leave it exposed above the ground.
- Provide adequate spacing: Plant hydrangeas at least three feet apart to allow for proper air circulation and avoid overcrowding.
- Avoid overwatering: Water your hydrangeas deeply but infrequently rather than frequently and shallowly. Allow the top inch of soil to dry out before watering again.
Adhering to these planting methods can foster an environment that inhibits fungal growth and encourages robust health for your hydrangea.
2. Maintaining Optimal Soil Moisture
Ensuring the soil remains moist without being overly saturated is crucial for hydrangea health.
To achieve the right moisture balance for your hydrangea, consider using a reliable soil moisture meter to check the soil’s moisture levels in the pot regularly.
This approach is especially beneficial for potted hydrangeas, as it helps gardeners maintain optimal soil moisture and prevent the common pitfalls of over or under-watering.
While hydrangeas require consistent moisture to thrive, excessive watering can lead to issues.
This tool will help you determine the ideal watering schedule, preventing overwatering and protecting the roots from excessive moisture.
Incorporating compost or other organic materials into the soil can enhance drainage and maintain the necessary moisture levels for robust plant growth.
3. Monitoring Soil PH And Fertility
Properly monitoring the soil’s pH level and fertility is crucial in preventing root rot on your hydrangea plants.
Hydrangeas thrive best in slightly acidic soil with a pH range between 5.2 to 6.2, so it’s essential to test your soil regularly using a reliable soil moisture meter or testing kit.
Moreover, maintaining proper nutrient levels is vital for hydration health.
Nitrogen (N), phosphorus (P), and potassium (K) are among the essential plant nutrients and should be balanced at all times since an excess of any one nutrient can cause damage to the roots.
4. Regular Maintenance And Monitoring
To avoid root rot in hydrangeas, regular maintenance and careful monitoring of your plants are crucial.
This includes inspecting the foliage for signs of disease, keeping the soil moist but not soaked, and regularly flushing out drainage holes.
Regularly monitor soil pH levels and nutrient content using a soil testing kit.
Regular maintenance can help you identify problems early on before they become severe.
For example, if you notice yellow leaves or wilting in your hydrangea during the growing season, it’s a sign that something is wrong with the plant.
By promptly identifying these symptoms, you can quickly correct any issues and save your plants from severe damage or death.
Final Thoughts
Ensuring the well-being of your hydrangea in gardening involves vigilant prevention and management of root rot, reflecting a deep level of care for your garden’s health.
To make this possible, you can implement effective treatments by grasping this condition’s origins, signs, and diagnosis techniques.
Maintaining adequate drainage and soil moisture is crucial while keeping an eye on your plant’s condition.
Following these guidelines will help you cultivate vibrant hydrangeas that flourish, free from issues such as root rot and other fungal infections.
Related Content
 Overwatered Hydrangea: How To Identify, Treat and Prevent It
 Underwatered Hydrangea: How To Identify, Treat & Prevent It
 How To Fix a Leggy Hydrangea (A Complete Guide)
 How Much Sun Does a Hydrangea Need (A Complete Guide)
 Hydrangea Leaves Curling? (11 Causes and Solutions)
 How To Save a Dying Hydrangea (11 Causes and Solutions)