Key Takeaways
- Repotting zebra plants is essential for optimal growth, ensuring adequate space for roots to expand and preventing nutrient depletion in the soil.
- The ideal time to repot your zebra plant is every two to three years, only when you see signs of root overcrowding or nutrient deficiency in the soil.
- Choosing the right pot size and well-draining soil mix are critical factors for successful transplantation, along with proper pre- and aftercare techniques like watering, fertilizing, and lighting.
- Following these tips on repotting zebra plants, you can maintain their health and vitality while enjoying their stunning foliage year-round as an eye-catching addition to any home or office space!
Repotting zebra plants is essential for maintaining their health, vitality, and optimal growth.
If you’re a plant owner looking to boost your zebra plant’s potential for lush foliage and vibrant blooms, this guide will walk you through the entire process, from choosing the perfect pot to proper aftercare.
By mastering repotting techniques and understanding your zebra plant’s unique needs, you can ensure it thrives indoors and becomes an eye-catching focal point in any living space.
Why Repotting Zebra Plants Is Essential For Optimal Growth
For the best growth of zebra plants, it is necessary to repot them.
This allows enough room for the roots to spread and stops the soil from losing nutrients.
Importance Of Adequate Space For Roots
Adequate space for roots is critical in fostering optimal growth for your zebra plants.
As the plant matures, its root system expands to support robust foliage and overall health.
Consider this scenario: You’ve had your zebra plant in the same small pot for years. Despite your efforts with fertilizer and sunlight, it struggles constantly.
The culprit may be that confined environment!
Relocating your beloved zebra plant into a larger container with ample room for burgeoning roots revitalizes its vigor and allows it to thrive as nature intended.
Nutrient Depletion In Soil
Nutrient depletion in the soil of potted zebra plants is a common issue faced by plant owners.
As water passes through the potting mix, essential nutrients are washed away over time, leaving your beloved houseplant with an insufficient food source.
To combat nutrient depletion, repotting your zebra plant every two to three years will provide fresh soil packed with essential minerals and organic matter needed for optimal growth.
During this process, consider including some slow-release fertilizer or supplement with regular liquid feedings after repotting.
When And How Often To Repot Zebra Plants
Knowing when and how often to repot your zebra plants is important to ensure their growth and health.
Keep reading to learn about their growth cycle, signs of distress, recommended frequency, and the steps you must take for successful transplantation.
Understanding The Growth Cycle Of Zebra Plants
The growth cycle of zebra plants is an essential aspect of their care and successful cultivation.
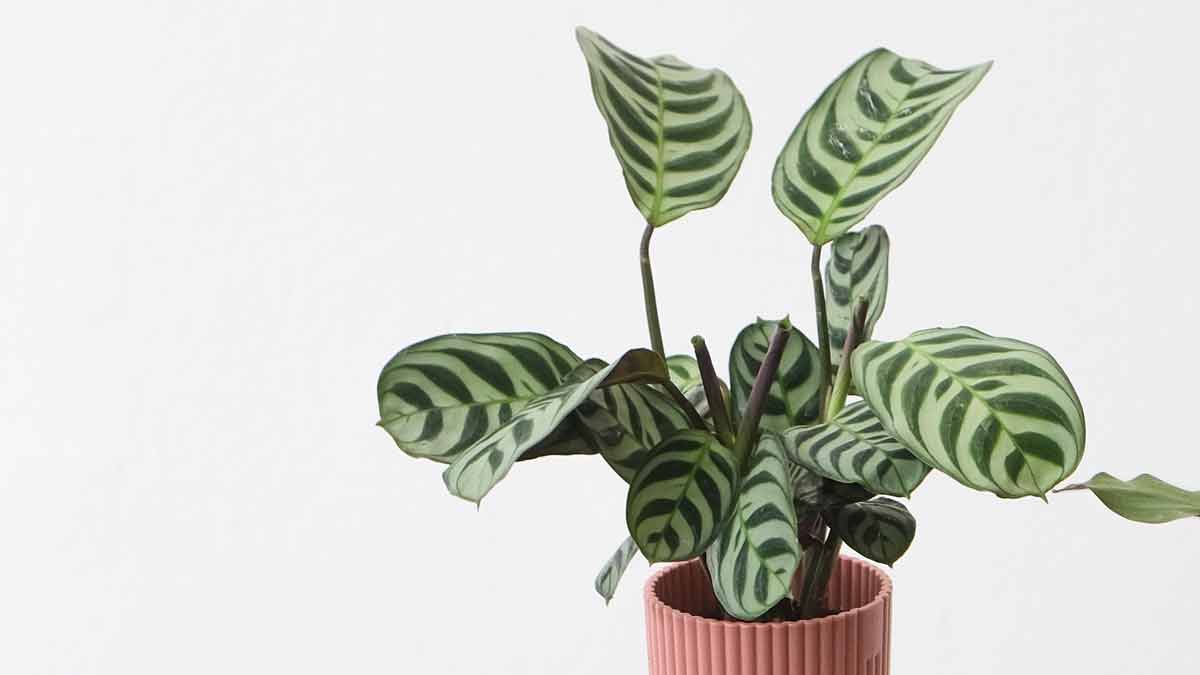
These attractive houseplants, native to Brazil, are slow-growing species that can reach maturity in approximately three years, growing up to a couple of feet tall.
Zebra plants undergo specific phases throughout the year as part of their natural growth cycle.
In the warmer months – typically spring and summer – these houseplants experience a surge in development due to increased temperatures and sunlight availability.
This period is characterized by enhanced foliage production with striking green leaves adorned by white stripes or spots.
During this phase, new plantlets may also emerge from existing stems or roots through propagation methods such as stem cuttings, leaf cuttings, or air layering.
During autumn and winter, their growth slows down considerably.
To avoid ruining potential blooming opportunities in the future, it’s recommended to wait until early spring before repotting since changing environments, while potbound can conditionally set flowering conditions.
Signs It’s Time To Repot
Zebra plants require adequate space for roots to thrive and can experience nutrient depletion over time.
Here are some signs it’s time to repot your zebra plant:
- Roots are growing through drainage holes at the bottom of the pot
- The plant is top-heavy and tends to tip over easily
- The soil is compacted and difficult to wet
- Water runs straight through the pot without being absorbed
- There is excessive foliage growth but fewer flowers than usual
- The root ball has grown too big, causing the plant to become root-bound
Observing these signs will help you determine when your zebra plant needs a new home.
Remember that it’s better to repot sooner rather than later to prevent further damage or stress on the plant.
Recommended Frequency For Repotting
To ensure optimal growth, it is recommended to repot zebra plants every two to three years.
This will provide enough time for the plant’s roots to grow and fully absorb the soil’s nutrients.
However, it’s important to remember that repotting should only be done when necessary – when you start seeing roots push out of the drainage holes or when there are visible signs of nutrient depletion in the soil.
If your zebra plant is thriving and healthy, then it may not need to be repotted as frequently.
How To Repot Zebra Plants For Maximum Growth
To repot zebra plants for maximum growth, choose a pot slightly larger than the current one and use well-draining soil.
Prepare the plant by gently removing it from its old container and pruning any damaged or rotten parts.
Place in the new container with moist soil and water thoroughly, avoiding fertilizing for a few weeks to prevent stress.
Choosing The Right Pot And Soil
Choosing the right pot and soil is crucial for repotting your zebra plant successfully.
Here are some factors to consider:
- Pot size: The new pot should be slightly larger than the previous one to allow room for growing roots. A good rule of thumb is to choose a pot that’s 1-2 inches larger in diameter.
- Drainage: Make sure the pot has drainage holes at the bottom to prevent waterlogging, which can lead to root rot.
- Material: Plastic pots are a good option as they retain moisture better than clay pots, which can dry out quickly.
- Soil type: Multi-purpose or peat-based soil mixes are suitable for zebra plants. Additionally, adding perlite or sand can improve drainage.
- Organic matter: Zebra plants prefer organically rich soil, so consider adding compost or worm castings before planting.
Remember, choosing the right pot and soil mix will give your zebra plant optimal growing conditions and help it thrive!
Preparing The Plant For Transplantation
Before repotting your zebra plant, it’s essential to prepare the plant for transplantation.
Follow these steps to ensure success:
- Water the plant thoroughly for at least 24 hours before repotting. This will make removing the plant from its current pot easier and reduce stress on the roots.
- Choose a new pot that is one size larger than the current one. Make sure it has drainage holes at the bottom and is clean.
- Prepare a well-draining soil mix that is rich in nutrients. A good soil mix for zebra plants consists of equal parts perlite, peat moss, and potting soil.
- Gently remove the zebra plant from its current pot by tapping the sides of the container and loosening the soil around its edges.
- Check the roots for any signs of rot or damage, trimming off any affected areas with sterilized scissors or pruning shears.
- Place a layer of fresh soil mix in the bottom of the new pot to provide a healthy base for your plant.
- Position your zebra plant in its new home, ensuring its base sits just below the top of the container.
- Fill in around your plant with fresh soil mix, gently firming it down around its roots as you go.
- Water your newly potted zebra plant thoroughly to help settle it into its new surroundings.
Preparing your zebra plant carefully before repotting will help minimize transplant shock and promote optimal growth potential for your cherished houseplant.
Steps To Successfully Repot A Zebra Plant
Repotting a zebra plant can be a simple process if done correctly.
Here are the steps to follow for successful repotting:
- Water the plant: Before starting the repotting process, thoroughly water the zebra plant. This will help prevent root damage during transplantation.
- Choose the right pot: Select a pot that is only 1 inch larger than its existing pot. A too-large container can lead to overwatering and root rot.
- Prepare fresh soil mix: Mix perlite, peat moss, and potting soil in equal parts to create a fresh soil mix.
- Remove from the existing pot: Carefully remove the zebra plant from its current pot, taking care not to damage the roots.
- Clean roots: Gently remove as much old soil as possible from the roots without tearing them.
- Repot in fresh soil mix: Place the zebra plant into the new pot and fill it with fresh soil mix around it until it reaches the same level it was previously planted at.
- Water thoroughly: Water evenly until moisture is visible at the drainage hole of the new pot.
For optimal results, it’s recommended to repot every two to three years. Additionally, be cautious of overwatering and avoid using excessively large containers.
Aftercare Tips For Optimal Growth
To take care of your zebra plant after repotting, water it regularly but wait for the top inch of soil to dry out before watering again.
During the growing season, fertilize every two weeks and place the plant in a bright area with indirect light.
Watering And Fertilizing
Proper watering and fertilizing are essential for the growth and health of your zebra plant.
Here are some tips to follow:
- Watering:
- Keep the soil consistently moist but not waterlogged.
- Use lukewarm soft water instead of hard water.
- Water once a week during cooler months and twice a week during warmer months.
- Avoid letting the pot sit in standing water, leading to root rot.
- Fertilizing:
- Apply fertilizer every 1 – 2 weeks during the active growing season (spring and summer).
- Use a water-soluble fertilizer formulated for flowers and foliage.
- Follow package instructions on how much fertilizer to use.
- Avoid over-fertilizing, as this can cause leaf burn or damage to the roots.
Light Requirements
Zebra Plants thrive in bright, indirect light.
This means they should be placed near a window with filtered sunlight or in a spot that receives plenty of daylight without direct sun exposure.
Regarding light requirements, you’ll want to pay close attention to the plant’s needs and adjust its placement accordingly.
For example, it’s best to keep your Zebra Plant in bright light but out of direct sunlight during the summertime.
If your plant isn’t getting enough light, try moving it closer to a window or providing additional artificial lighting.
Monitoring For Stress
Repotting can be stressful for zebra plants, so monitoring them closely after transplanting is crucial.
Look for signs of stress, such as droopy leaves or yellowing foliage, which could indicate that the plant is not adapting well to its new environment.
To minimize stress and ensure optimal growth, give your zebra plant plenty of indirect light and maintain high humidity levels of around 50-60 percent.
Watch for pests like spider mites or whiteflies, which can further weaken a stressed-out plant.
Common Mistakes To Avoid When Repotting Zebra Plants
To ensure optimal growth when repotting zebra plants, it’s important to avoid certain mistakes.
These include overwatering, underestimating the size of the new pot, and using the wrong type of soil.
Overwatering
One of the most common mistakes plant owners make when repotting Zebra Plants is overwatering.
While providing your plant with ample moisture may seem beneficial, too much water can harm your Zebra Plant’s growth.
Overwatering can lead to root rot, damaging the roots and eventually killing the plant.
To avoid overwatering, use a well-draining soil mix that allows water to flow freely through the pot.
Proper care and maintenance of your Zebra Plant include paying attention to its watering needs while avoiding overwatering.
Remember that too much moisture can cause severe problems for this sensitive plant species.
Underestimating The Size Of The New Pot
One common mistake many plant owners make when repotting their zebra plants is underestimating the size of the new pot required for optimal growth.
While it may seem counterintuitive, using a pot that’s too large can harm your plant by trapping excess moisture and increasing the risk of root rot.
Instead, opt for a pot only slightly bigger than the previous one, around 1 “-2” larger, to ensure proper drainage and allow room for root expansion.
To avoid this error, consider measuring your plant’s current container before purchasing a new pot or consulting an expert at a good gardening store.
Remember that your zebra plant doesn’t need to be repotted often – only every two to three years – so investing in the right size and type of container will benefit its long-term growth.
Using The Wrong Type Of Soil
Choosing the right soil when repotting your zebra plant is crucial for its growth and survival.
Using the wrong type of soil can lead to problems like root rot, poor drainage, and nutrient deficiencies.
Avoid using heavy soils that retain too much moisture or clay-like soils that prevent water from draining properly.
Additionally, it’s important to avoid using garden soil or topsoil as they are often too dense for container-grown plants and may contain weed seeds or harmful bacteria.
A good idea would be to get a recommended soil mix from a good gardening store or make your own by mixing different types of organic matter.
Final Thoughts
Repotting zebra plants is essential for achieving optimal growth and preventing diseases or pests.
Understanding the signs and timing for repotting, choosing the correct pot and soil mix, and aftercare tips such as proper watering and lighting are essential.
By avoiding common mistakes like overwatering or using the wrong type of soil, plant owners can enjoy healthy and thriving zebra plants all year round.


