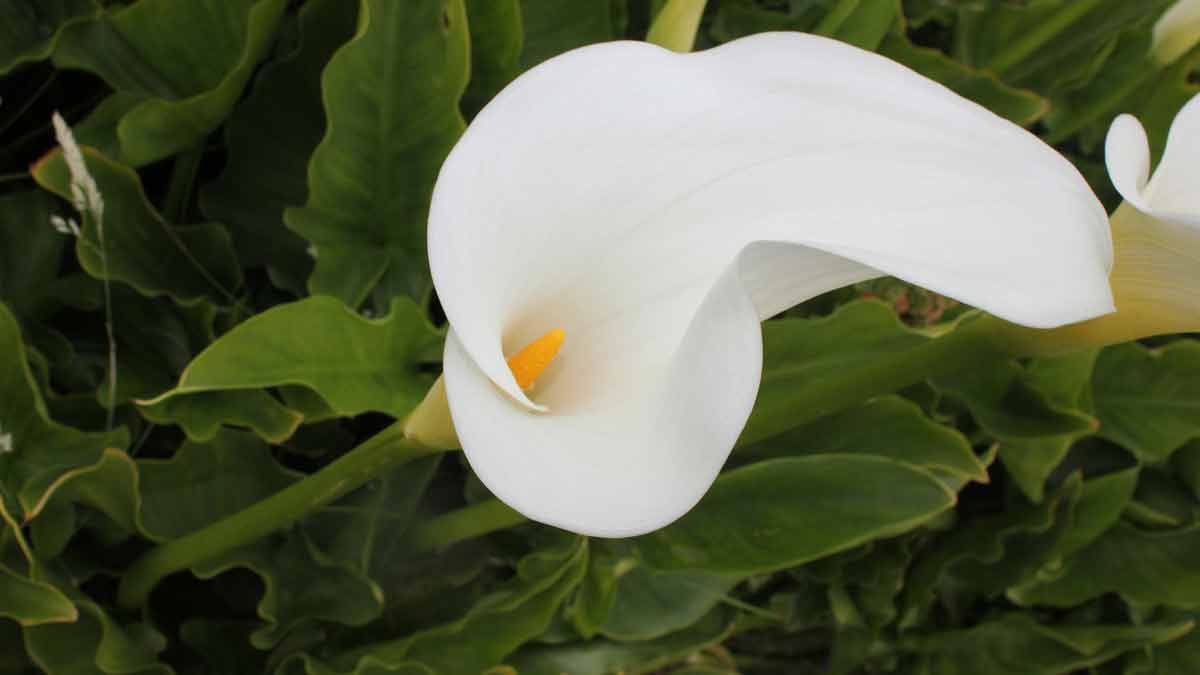
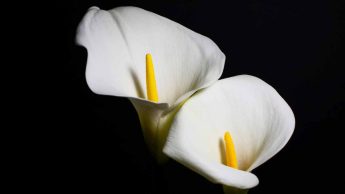
Calla Lilies are cherished for their striking flowers in various colors and appealing foliage, characterized by elongated, lance-shaped, typically green leaves.
It’s essential to address any issues promptly to make the most of their beauty.
However, it’s common for Calla Lily leaves to turn yellow, a condition that can stem from various factors such as nutrient deficiencies, pests, or diseases.
What Causes Calla Lily Leaves to Turn Yellow and How To Fix It
Experiencing yellowing leaves on your Calla Lily can be concerning, but it’s a widespread issue among gardeners. Fortunately, this problem is often manageable.
Here’s a breakdown of the primary reasons why Calla Lily leaves turn yellow, along with effective solutions for each:
1. Overwatering
Overwatering is a common issue that leads to yellow leaves in Calla Lilies native to African marshes and swampy areas.
Despite their natural habitat, excessive moisture can harm them as much as drought, potentially causing root rot and plant death.
The amount of water Calla Lilies receive is crucial; too much can be just as detrimental as too little.
Factors contributing to overwatering include:
- Inadequate Pot Size: Small pots restrict root growth and cause waterlogging.
- Poor Drainage: Failing to remove excess water from the saucer keeps roots submerged.
- Excessive Watering: Watering should only occur when the soil feels dry.
Signs of Overwatering in Calla Liles
- Yellow Leaves: An early indicator of too much water.
- Drooping Leaves: Suggests insufficient oxygen uptake.
- Soft or Mushy Leaves: Indicates rot.
- Stunted Growth: Slower than expected growth can be a sign of overwatering.
- Fungal Presence: Mold or mildew on leaves signals excessive moisture.
Solutions for Overwatering
- Drainage: Use pots with drainage holes to prevent water accumulation.
- Reduced Watering Frequency: Water only when the soil is dry.
- Allow Soil to Dry: Ensure the soil is dry before re-watering.
- Repotting: Waterlogged roots may require fresh, dry soil.
- Adjust Watering Schedule: Cut back to watering once a week or less.
- Soil Aeration: Loosen compacted soil to improve oxygen flow to roots.
- Well-Draining Soil: Opt for soil that prevents waterlogging.
- Soil Amendments: Add perlite or sand to enhance drainage.
- Pruning: Remove damaged leaves to focus energy on healthy growth.
Implementing these measures can help restore your Calla Lilies to health, preventing the adverse effects of overwatering.
2. Underwatering
Underwatering is just as detrimental to Calla Lilies as overwatering, often leading to leaves turning yellow.
These plants thrive in moist, but not waterlogged, conditions. Allowing the soil to become too dry can result in yellow leaves that may eventually fall off.
Common reasons for underwatering Calla Lilies include insufficient watering, overly large pots, root-bound plants, and hot, dry climates.
Identifying Underwatering in Calla Lilies
Signs of insufficient watering in Calla Lilies include:
- Yellow Leaves: An early indicator of underwatering.
- Drooping Leaves: Signify a lack of water.
- Brown or Crispy Leaves: Indicate inadequate moisture.
- Slow Growth: A potential sign of underwatering.
Remedying Underwatering
To address underwatering:
- Increase Watering Frequency: Water Calla Lilies whenever the soil feels dry.
- Opt for Smaller Pots: Large pots can cause the soil to dry out too quickly.
- Transplant Root-Bound Lilies: Moving them to a larger pot can help ensure they receive adequate water.
- Apply Mulch: Mulching with straw, bark, or leaves helps maintain soil moisture.
- Group Plants: Positioning Calla Lilies together can create a moisture-retaining microclimate.
- Morning Watering: This allows plants to hydrate before the day heats up.
Adjusting your care routine by following these steps can help prevent underwatering, ensuring your Calla Lilies remain healthy and vibrant.
3. Pest Infestation
Pest infestations are a prevalent issue causing the yellowing of Calla Lily leaves.
Common pests attacking Calla Lilies include:
- Aphids: Small, green insects feeding on Calla Lily sap, usually found on leaf undersides.
- Spider Mites: Tiny, spider-like creatures consume plant sap and leave small webs on leaves.
- Thrips: Small, winged insects feeding on plant sap, causing leaves to yellow or brown and potentially leading to flower loss.
- Mealybugs: Small, white insects feeding on plant sap and leaving a sticky residue on leaves.
Identifying a Pest Infestation on a Calla Lily
Signs of pest infestation include:
- Yellow or brown leaves indicate potential pest presence.
- Sticky residue on leaves is a sign of mealybugs.
- Small webbing on leaves, pointing to spider mites.
- Small holes in leaves, likely caused by aphids or thrips.
- Slowed growth, which may signal an infestation.
Eliminating Pests
To combat a pest infestation:
- Insecticidal Soap: A safe and effective remedy for aphids, spider mites, and thrips.
- Neem Oil: A natural insecticide effective against aphids, spider mites, and thrips.
- Horticultural Oil: A safe option for eradicating aphids, spider mites, and thrips.
- Diatomaceous Earth: A natural substance that kills aphids, spider mites, and thrips.
These strategies can help manage and prevent pest infestations, ensuring the health and vitality of your Calla Lilies.
4. Fungal Diseases
Fungal diseases are a prevalent issue that leads to the yellowing of Calla Lily leaves. The most common culprits are powdery mildew and botrytis.
- Powdery Mildew: This is a white, powdery coating on leaves and stems.
- Botrytis: This manifests as a grayish-white growth on both flowers and leaves.
Identifying Fungal Diseases
You can suspect a fungal infection through several indicators:
- Yellow or Brown Leaves: Often the initial sign of infection.
- White Powder on Leaves: Indicates powdery mildew.
- Grayish-White Growth: Suggests botrytis on flowers and leaves.
- Stunted Growth: A slowdown in growth rate can also signal fungal issues.
Managing Fungal Diseases
To combat fungal diseases, consider the following strategies:
- Apply Fungicides: Select a fungicide effective against both powdery mildew and botrytis.
- Remove Infected Leaves: Detach and dispose of any diseased leaves to prevent further spread.
- Enhance Air Circulation: Improving airflow around Calla Lilies helps deter fungal growth.
- Water Appropriately: Avoid overwatering by ensuring the soil is dry before watering again.
By taking these steps, you can manage fungal diseases and maintain the health of your Calla Lilies.
5. Poor Drainage
Poor drainage is a prevalent issue leading to Calla Lily leaves’ yellowing.
Calla Lilies flourish in well-drained soil. Overly moist soil can result in root rot, manifesting as yellow or brown leaves.
Identifying Poor Drainage
Several indicators suggest poor drainage:
- Yellow or Brown Leaves: Often the initial sign of drainage issues.
- Root Rot: Indicates potential drainage problems.
- Waterlogged Soil: A clear sign of inadequate drainage.
Improving Drainage
To tackle issues with inadequate drainage, explore the following approaches:
- Well-Draining Potting Mix: Ensure using a potting soil mix that facilitates proper drainage.
- Organic Matter: Incorporate organic material to enhance soil drainage.
- Soil Amendment: For heavy clay soils, amendment with sand or perlite can improve drainage.
- Drainage Holes: Opt for pots equipped with drainage holes to prevent water accumulation.
By addressing drainage issues with these strategies, you can create an environment where Calla Lilies can thrive, free from the risk of root rot and leaf discoloration.
6. Nutrient Deficiencies
Nutrient deficiencies are a prevalent reason for yellowing in Calla Lily leaves.
Calla Lilies require specific nutrients for optimal growth. Insufficient nutrient levels can result in yellow foliage, with nitrogen and iron deficiencies being the most common culprits.
Identifying Nutrient Deficiencies
Signs of nutrient deficiencies include:
- Yellow Leaves: Often the initial indicator of a nutrient shortfall.
- Stunted Growth: Slower than expected growth can signal a deficiency.
- Undersized Leaves: Smaller leaves than normal may indicate a lack of nutrients.
Addressing Nutrient Deficiencies
To remedy nutrient deficiencies:
- Utilize Fertilizer: Choose a fertilizer rich in nitrogen and iron to address deficiencies.
- Incorporate Organic Matter: Enhancing the soil with organic matter can boost its nutrient profile.
- Amend Soil: If the soil is nutrient-poor, enriching it with compost or manure can be beneficial.
- Repot: For potted plants, repotting in a nutrient-rich potting mix may be necessary if the current mix is deficient.
7. Overfertilization
Overfertilization is a prevalent issue that leads to the yellowing of Calla Lily leaves.
Excessive fertilization results in nutrient accumulation in the soil, causing leaf discoloration to yellow or brown.
This accumulation not only impacts the immediate appearance of the plant but also interferes with the plant’s ability to absorb essential nutrients, leading to a detrimental cycle that can impair growth and vitality.
Identifying Overfertilization
The signs of overfertilization include:
- Yellow Leaves: The initial indicator of excess fertilization.
- Leaf Burn: Leaves become brown or black suggest overfertilization.
- Root Damage: Compromised plant roots can indicate overfertilization.
- Soil Leaching: Nutrient runoff from the soil points to overfertilization.
Remedying Overfertilization
To address overfertilization, consider the following steps:
- Flush the Soil: Rinse the soil thoroughly with water to wash away surplus fertilizer.
- Reduce Fertilizer Use: Minimize the frequency and quantity of fertilizer application.
- Repotting: Repot the Calla Lily in fresh soil to balance nutrients for an overly nutrient-rich potting mix.
Implementing these measures can help correct overfertilization, ensuring your Calla Lily’s health and vibrant foliage.
8. Lack of Light
A prevalent issue causing Calla Lily leaves to turn yellow is insufficient light, a critical component of indoor gardening.
Calla Lilies flourish in abundant light, and a deficit can lead to discolored leaves.
This is because light influences chlorophyll levels, the pigment responsible for the leaves’ green hue. Insufficient light reduces chlorophyll, resulting in yellow leaves.
Identifying Light Deficiency
Several indicators suggest a light deficiency:
- Yellow Leaves: Often the first sign, indicating inadequate light.
- Leggy Stems: Long and thin stems suggest a lack of sufficient light.
- Slow Growth: A plant growing slower than expected might be experiencing light shortage.
- Small Leaves: Leaves smaller than usual can also indicate insufficient light.
Remedying Light Deficiency
To address a light deficiency, consider the following steps:
- Relocate the Plant: Move it to a brighter spot for ample light.
- Supplement with Artificial Light: Artificial lighting can compensate for lacking natural light.
- Prune the Plant: Overly dense foliage can block light. Pruning helps improve light absorption.
- Position Near a Window: Placing the Calla Lily closer to a window can increase its exposure to natural light.
These measures can significantly improve Calla Lily’s health, preventing yellow leaves and promoting vigorous growth.
9. Sunburn
Calla Lilies thrive in abundant light, yet excessive sunlight can be detrimental, leading to scorched leaves that may be yellow or brown.
These plants require a balance of ample light and protection from the intense midday sun.
Identifying Overexposure to Sunlight
Several signs indicate excessive sunlight:
- Yellow or brown leaves are often the initial indication of too much sun.
- Scorched leaves that turn brown or black suggest overexposure.
- Damaged flowers can also imply the plant is receiving too much sunlight.
Remedies for Excessive Sunlight
To mitigate the effects of excessive sunlight, consider the following actions:
- Relocate the Plant: To avoid direct exposure, move it to an area with partial sun or filtered light.
- Provide Shade: In full sun, introduce partial shade using an umbrella or a cloth to shield the plant.
- Adjust Windowsill Placement: Moving plants on south-facing windowsills to an east- or west-facing windowsill can reduce sun exposure.
Implementing these measures can ensure your Calla Lilies receive the optimal balance of sunlight, avoiding the harmful effects of overexposure.
10. Low Humidity
Calla Lilies thrive in high humidity environments and suffer in low humidity conditions.
Dry air can lead to yellowing and dropping the leaves, indicating the plant is not in its ideal environment.
Identifying Low Humidity
Low humidity can manifest through several signs, such as:
- Yellow Leaves: An early indicator of low humidity.
- Dry Leaves: Leaves that are dry and brittle point to insufficient humidity.
- Dropping Leaves: Leaves falling off the plant also suggest low humidity levels.
Solutions for Low Humidity
To combat low humidity, consider the following strategies:
- Group Plants: Cluster your Calla Lilies together to naturally increase humidity in their vicinity.
- Use a Humidifier: A humidifier can effectively raise the moisture level in the air, benefiting the plants.
- Pebble Tray: Placing your Calla Lily on a tray filled with pebbles and water can also help boost the surrounding humidity.
These measures help maintain the right humidity levels for Calla Lilies to flourish.
11. Temperature Stress
Calla Lilies thrive in warm environments and struggle in cold conditions.
When temperatures fall too low, the plant’s leaves may turn yellow or brown, and its flowers can wilt or drop prematurely.
Identifying Temperature Stress
You can recognize temperature stress by several indicators:
- Yellow or Brown Leaves: This is often the initial sign of temperature stress.
- Wilted Flowers: Flowers wilting may indicate they’re suffering from temperature stress.
- Dropping Flowers: Flowers falling off the plant prematurely is another sign of temperature stress.
Addressing Temperature Stress
If you suspect your plant is experiencing temperature stress, you can take several steps to mitigate the issue:
- Relocate the Plant: Move your Calla Lily to a warmer area, protecting it from drafts.
- Use a Heat Lamp: For plants in cooler environments, a heat lamp can help increase the surrounding temperature.
- Opt for a South-Facing Windowsill: If your Calla Lily is currently on a north-facing windowsill, moving it to a south-facing windowsill can provide more warmth and light.
Identifying and addressing temperature stress can help your Calla Lilies recover and thrive in their preferred warm conditions.
12. Transplant Shock
Transplant shock refers to the stress a Calla Lily experiences when moved from one location to another, such as transferring it to a new pot or replanting it in the ground.
This condition can lead to symptoms like the yellowing or browning of leaves and wilting, indicating the plant’s struggle to adapt.
Identifying Transplant Shock
Transplant shock manifests through several key indicators:
- Yellow or Brown Leaves: This is often the initial sign of transplant shock.
- Wilting: A plant drooping or wilting may be suffering from this condition.
- Stunted Growth: Noticeably slower growth rates can also signify transplant shock.
Addressing Transplant Shock
To mitigate transplant shock, follow these steps:
- Avoid Immediate Watering: Post-transplant, refrain from watering the plant for a few days to allow it to settle into its new environment.
- Provide Shade: Position the plant in a shaded area away from direct sunlight to reduce stress.
- Allow Adjustment Time: Understand that acclimatization to a new location might take weeks or months. Patience is key during this period.
Recognizing the signs of transplant shock and taking appropriate action can help your Calla Lily recover and thrive in its new setting.
13. Natural Causes of Yellowing Leaves
The yellowing of Calla Lily leaves may sometimes be attributed to natural causes related to the plant’s life cycle or seasonal changes.
Understanding that this is a normal phenomenon means there’s often no cause for concern.
The plant is expected to revert to its typical coloration in due course.
Identifying Natural Causes of Yellow Leaves
To determine if the yellowing is natural, look for these indicators:
- Dormancy: A key sign is if the plant enters dormancy, often during winter.
- Seasonal Changes: Yellowing in fall or spring can indicate a reaction to seasonal transitions.
- Life Cycle: Yellowing during summer may reflect the plant’s natural growth process.
Managing Yellowing from Natural Causes
Although intervention is unnecessary for yellowing due to natural causes, enhancing the growing conditions can swiftly support the plant’s return to its vibrant color with some care.
There’s no specific remedy required, as the Calla Lily will naturally recover its normal hue over time.
Final Thoughts on Calla Lilies Yellowing Leaves
Growing Calla Lilies is straightforward, yet encountering yellow leaves indicates potential issues in your gardening endeavors, emphasizing the importance of proper Calla Lily plant care
The causes behind yellowing leaves in Calla Lilies range from pests and diseases to suboptimal growing conditions.
Start by inspecting the plant for pests or disease indicators. The absence of these suggests reassessing the growing conditions, ensuring the plant receives adequate light, water, and nutrients within the garden.
Often, rectifying yellowing leaves requires minor adjustments in care.
Calla Lilies can flourish with attentive maintenance, yielding vibrant blooms for years.
Related Content
 Why Are My Calla Lily Leaves Curling? (10 Solutions)
 Why Is My Calla Lily Dripping Water? (An Easy Guide)
 Why Are My Calla Lily Leaves Turning Brown (& How To Fix It)
 Overwatered Calla Lily: How To Identify, Treat and Prevent It
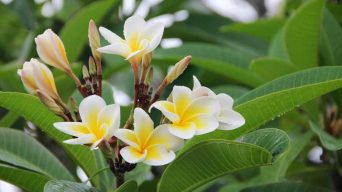 Why Are My Plumeria Leaves Turning Yellow? (13 Solutions)
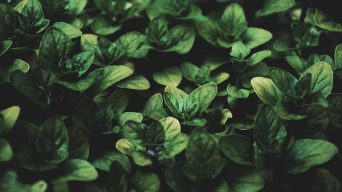 Why Are My Basil Leaves Turning Yellow? (13 Solutions)