Alocasia can be propagated in water by cleaning the roots and placing them in a container with clean water. River or lake water is preferable to tap water, which contains chlorine. Water propagation is the best method for propagating new plants when the bulb or cutting lacks a strong existing root. It is also the easiest way to propagate and display the plant.
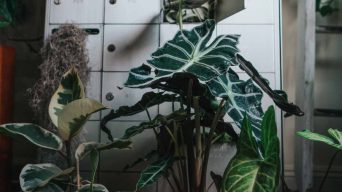
Alocasia plants are a popular choice for indoor gardens due to their large and striking foliage.
Propagating Alocasia in water has become increasingly popular among plant enthusiasts due to its simplicity and effectiveness.
In this complete propagation guide, we will walk you through the steps involved in successfully propagating Alocasia in water, including:
- Choosing the proper stem cutting
- Preparing the equipment and materials
- Taking care of the cutting during propagation
- Transferring it to the soil once ready
- Troubleshooting common problems that arise
Whether you’re an experienced gardener or just starting your plant journey – this guide is perfect for anyone looking to grow beautiful Alocasia plants!
Overview Of Alocasia And Its Popularity
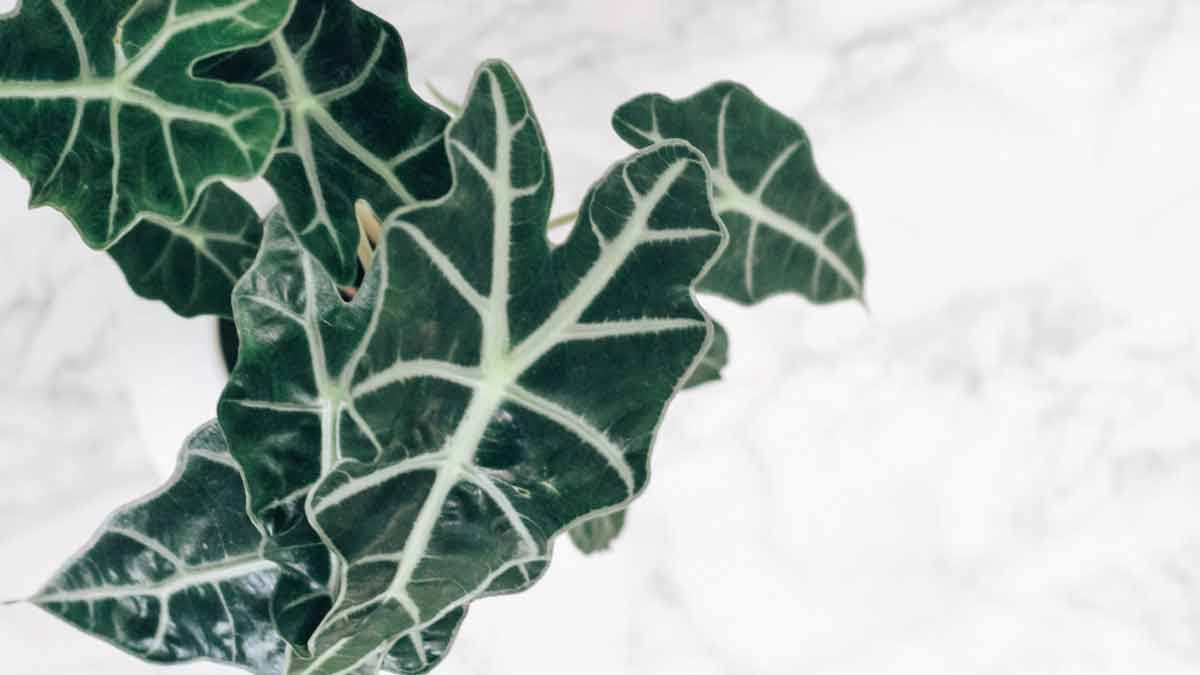
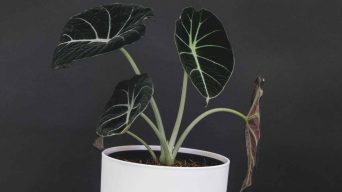
Alocasia, commonly known as the elephant ear plant, has surged in popularity among plant enthusiasts due to its striking appearance and exotic appeal.
Hailing from the tropical regions of Southeast Asia and Eastern Australia, these plants boast large, dramatic leaves that can transform any living space into a lush indoor jungle.
The rising popularity of growing Alocasia in the water adds to their allure among passionate indoor gardeners continuously seeking innovative ways to propagate their beloved plants.
Benefits Of Propagating Alocasia In Water
Propagating Alocasia in water offers a wealth of advantages to novice and experienced plant enthusiasts.
One of the primary benefits is the ability to observe root development, enabling you to track progress and identify issues promptly.
Another advantage of growing Alocasia in water is that it reduces the risk of common problems such as root rot – an issue often encountered when over-watering or using poorly-draining potting mixtures.
Additionally, propagating with this method minimizes potential damage caused by pests such as spider mites, which are more likely to infest plants grown in soil.
Lastly, water propagation requires minimal equipment and materials; you only need a suitable container and clean water.
This simplicity makes it an accessible option for individuals looking to expand their indoor garden without breaking the bank or requiring extensive resources.
The Importance Of Proper Techniques For Successful Propagation
Utilizing the correct techniques for successful Alocasia propagation ensures your new plant’s healthy growth and development.
The process begins with selecting a healthy mother plant; this sets a strong foundation and leads to more viable cuttings.
One example of an effective technique is using sterilized equipment when taking cuttings from the parent plant – this helps prevent potential infection and contamination that could hinder growth.
Additionally, after placing your cutting in water for propagation, providing adequate sunlight and maintaining ideal temperature conditions are vital for promoting root development.
Choosing The Right Alocasia PlantFor Propagation
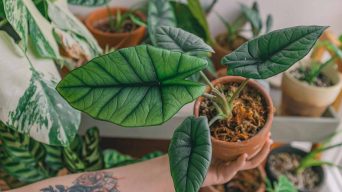
Propagation of Alocasia plants in water requires careful attention to detail, starting with selecting a healthy plant and suitable stem cutting.
Identifying the correct node for cutting is crucial for the success of the propagation process.
Whether you’re a seasoned gardener or a beginner, here we’ll provide the necessary information to ensure a thriving Alocasia plant.
Keep reading to learn more about the art of propagating Alocasia in water.
Identifying A Healthy Alocasia Plant For Propagation
Identifying a healthy Alocasia plant is crucial to achieving optimal results when propagating in water.
Choosing a mother plant that exhibits strong growth and good overall health is essential to ensure successful propagation.
A healthy parent plant will give your propagated cutting the best chance at thriving once transferred to its new environment.
For instance, consider choosing an Alocasia Polly due to its impressive adaptability in various growing conditions.
After selecting the ideal mother plant, observe it closely over some time – this allows you to track its progress and detect any subtle changes in appearance that might signify underlying issues.
Knowing The Right Stem Cutting For Propagation
Choosing the right stem cutting is crucial in propagating Alocasia plants.
Selecting a healthy plant with strong stems is important for the best results.
When choosing a stem, look for one at least six inches long with several leaves attached.
Selecting the correct type of cutting for propagation is crucial based on your specific Alocasia species.
Some species can be propagated through leaf cuttings, while others need corms or tubers for successful propagation.
For example, Alocasia Polly cannot be propagated via stem cutting as this plant has rhizomes instead.
Using an incorrect method may lead to failure in propagating your plant successfully.
Understanding The Difference Between A Node And A Bud
In propagating Alocasia, it’s essential to differentiate between a node and a bud.
A node is a point where leaves attach themselves to the stem, while a bud is where new growth will emerge.
When choosing an Alocasia plant for propagation, you should look for a healthy parent plant with at least one or two nodes on its stem.
It’s important to note that not all nodes are created equal when propagating Alocasia in water.
The uppermost ones are ideal since they produce more hormones responsible for root growth than lower nodes.
Additionally, you should avoid selecting stems with buds as these need the energy to develop into shoots instead of growing roots first.
Choosing The Right Node For Successful Propagation
One of the most important factors when propagating Alocasia plants is choosing the correct node for successful propagation.
Nodes are the spots on a stem where roots and leaves develop, making them crucial in plant propagation.
To select the correct node, look for one that is healthy and has at least two to three leaves growing.
Another thing to remember when selecting nodes is to avoid using those too close or too far from the parent plant.
Choosing a node too close to the parent plant could affect its growth and health.
On the other hand, if you pick a node too far away from the parent plant, it may be challenging to propagate successfully since nutrient transfer between connected nodes is critical in developing new roots and shoots.
Preparing The Equipment And Materials
To successfully propagate plants, one must have the right tools and materials.
A sharp knife, a transparent container filled with clean water, and rooting hormone powder are all essential ingredients in the propagation process.
With these materials, gardeners can significantly increase their chances of success and easily create new plants.
Whether you’re a seasoned horticulturist or a novice gardener, having the proper materials is crucial for successful propagation.
Gathering The Necessary Materials For Propagation In Water
To successfully propagate your Alocasia plant in water, you will need the following materials:
- A healthy Alocasia plant with a stem suitable for cutting
- Sharp and clean gardening shears or scissors
- Clean and clear glass or plastic container for holding water
- Distilled, filtered, or rainwater to avoid harsh chemical exposure to the plant
- Rooting hormone powder or gel (optional)
- Pebbles, rocks, or marbles for anchoring the cutting in the water
- Strips of light-blocking material like black paper or cloth to cover the container
Ensure all materials are clean and free of dirt or debris before carefully gathering them together.
While the rooting hormone may help speed up the propagation process, it is not always necessary to successfully propagate an Alocasia plant in water.
Choosing The Right Container For Propagation
Selecting the correct container is crucial for successful Alocasia propagation in water.
The container should be big enough to hold the stem cutting and its roots without crowding but not too large that it hinders root development.
Glass jars or vases are the perfect choices, allowing easy root growth monitoring while adding a stylish touch to your home decor.
When preparing the container, ensure it is clean, free of dirt or debris, and disinfected with hydrogen peroxide solution (1 part hydrogen peroxide: 3 parts water).
This helps to prevent bacterial infection during propagation, which can lead to rotting of stems and leaves.
As an added precaution against diseases, avoid tap water as it may contain harmful chemicals to plants.
Instead, use distilled or filtered water at room temperature for optimal results.
Preparing The Water For Successful Propagation
To ensure the successful propagation of Alocasia in water, it is essential to prepare the water adequately.
Tap water may contain high chlorine levels or other harmful chemicals that can damage the plant and prevent growth.
Therefore, it is recommended to use filtered or distilled water for propagation.
Another critical aspect when preparing the water is its pH level. The ideal pH range for most Alocasia plants is between 5.5 and 7.0.
Lastly, adding a small amount of soluble fertilizer to the water every few weeks can promote robust and healthy growth in the new plant.
Proper preparation of the propagating medium (in this case, water) is vital in ensuring a successful growing experience for your beloved Alocasias.
Deciding The Right Location For The Propagation Container
Choosing the right location for your propagation container is essential in successfully growing Alocasia in water.
When selecting a spot, it’s essential to consider the natural light and temperature level in your space.
Ideally, you want to place your container in a bright room with indirect sunlight throughout the day.
Additionally, you should avoid placing your container near vents or drafty areas, as fluctuations in temperature can disrupt growth and cause stress on the plant.
A consistent environment with mild temperatures between 65-80 degrees Fahrenheit will help ensure optimal growth conditions for your new Alocasia plant.
Propagation Alocasia In Water
From selecting the perfect stem to caring for your new plant, this step-by-step process will ensure that your Alocasia thrives and becomes a beautiful addition to your home.
Follow along and discover the joy of propagating your plants.
Cutting The Stem At The Appropriate Spot For Successful Propagation
Cutting the stem of an Alocasia plant is a crucial step to ensure successful propagation.
Here are some helpful tips on how to cut the stem at the right spot:
- Use sterile shears or scissors to cut the stem.
- Look for a healthy and mature stem with several leaves.
- Choose a spot about 6 inches from the tip of the stem where at least one node is present.
- Make a clean cut below the node, ensuring no rough edges or tears on the stem.
- Remove lower leaves from the cutting to prevent rotting in water or soil.
By following these steps, you can ensure that your Alocasia cutting has the best chance of successful propagation in water or soil.
Preparing The Stem Cutting
Choosing a healthy plant and making a clean cut at the appropriate spot is crucial to prepare the stem cutting for propagation.
Look for a firm, green stem free from damage or disease.
Cut the stem at a 45-degree angle below where a leaf connects to the stem using sharp scissors or pruning shears.
Once you have made your cut, remove all but one or two leaves from the bottom of the stem cutting.
This will help reduce moisture loss through transpiration while promoting root growth in water.
You can dip the freshly cut end into rooting hormone powder before placing it in water, though some Alocasia varieties do not require this step.
Placing The Stem Cutting In The Container
Once you have prepared the stem cutting for propagation, it’s time to place it in the container.
Use a clear glass or plastic container filled with water and ensure that at least one node is submerged.
Choosing a clear container is essential to monitor your Alocasia plant’s growth easily.
Choose a location with bright indirect light but avoid direct sunlight since too much sun can damage the cutting.
Remember to change out the water every week or when it becomes cloudy to prevent bacteria build-up, which could result in root rot.
Taking Proper Care Of The Stem Cutting During Propagation
Once you have placed the stem cutting in the container, monitoring and properly caring for it during propagation is crucial.
Firstly, ensure the container is in a location with bright indirect light and consistent temperatures between 70-80°F.
Next, check your cuttings regularly to ensure the water level remains constant.
If needed, add more water to submerge the bottom half of your stem without completely covering any leaves.
During this period, avoid fertilizing your Alocasia plant until after transplanting it into the soil.
Fertilizers may contain too many nutrients that can harm or kill delicate baby plants.
By properly caring for your stem cutting during propagation – controlling temperature and exposure to light/sunlight, monitoring water level, and avoiding fertilizer – you’ll give yourself an excellent chance at success when transferring cutting to soil later on!
Transferring The Cutting To The Soil
Transferring a cutting from water to soil is a delicate process that requires care and attention to ensure success.
Once roots and new growth have emerged, it’s time to transition.
The key is to gently remove the cutting from its container and transfer it to moist potting soil, covering the roots thoroughly.
Following these steps gives your cutting the best chance to thrive and grow into a healthy plant.
Identifying Indications That The Cutting Is Ready For Transplantation
Before transferring your Alocasia cutting from water to the soil, looking for a few indications that the plant is ready for transplantation is essential.
Firstly, keep an eye on the roots of the cutting – if they have grown at least 2 inches in length, this is a good sign that the plant has established its root system and can now be transferred.
Another indication to look out for is new leaf growth.
It’s also important not to rush into transferring your Alocasia cutting too quickly, as doing so before it’s ready could lead to transplant shock or even cause damage to the young plant.
The Right Method Of Transferring The Cutting To Soil
When the Alocasia cutting has developed enough roots, it is time to transfer it to the soil for optimal growth.
Here’s how to do it:
- Choose a pot slightly larger than the cutting, ensuring it has drainage holes at the bottom.
- Fill the pot with a high-quality potting mix that drains well and has good aeration.
- Make a small hole in the center of the soil that is deep enough for the root ball of the cutting.
- Gently remove the cutting from its container and loosen any tangled roots without damaging them.
- Place the root ball into the hole and cover it with soil.
- Firmly press down on the soil around the base of the plant to ensure stability.
- Water thoroughly until water drains out of the bottom of the pot, then let it drain completely before placing back in its location.
Adjust your watering schedule according to your plant’s needs and monitor for signs of stress or problems such as root rot or spider mites.
With proper care and attention, your new Alocasia plant should thrive in its new soil environment!
Taking Proper Care Of The New Plant After Transplantation
Once you have successfully transferred the Alocasia cutting to the soil, ensuring adequate care for optimal growth is crucial.
Start by placing the plant in a bright and indirect light area, away from direct sunlight.
Additionally, maintain high humidity levels around the plant by spraying water on its leaves regularly or using a humidifier.
To promote healthy growth, consider supplementing with fertilizers every 2-3 weeks during the growing season.
Finally, look for any signs of pests, such as spider mites, and immediately act if detected.
Tips For Promoting Optimal Growth
To promote optimal growth during the propagation process of Alocasia, keep in mind the following tips:
- Provide adequate light: Alocasia thrives in bright, indirect light. Ensure the container holding the cutting is placed in a location with sufficient lighting.
- Keep humidity levels high: High humidity levels are essential for successfully propagating Alocasia cuttings. Consider using a humidifier or placing the container holding the cutting on a tray filled with pebbles and water to promote humidity.
- Maintain proper watering: Overwatering can lead to root rot, while underwatering can cause the plant to wilt. Ensure that you water the cutting adequately but not excessively.
- Use suitable potting medium: When transferring the cutting to the soil, ensure that the right potting soil provides good drainage and nutrients for optimal growth.
- Avoid direct sunlight: Direct sunlight can scorch Alocasia leaves, leading to stunted growth or plant death. Ensure you place the container holding the cutting in an area with bright but indirect light.
Common Problems And Troubleshooting
In the world of Alocasia propagation, success is not always guaranteed.
Various issues can arise, from pesky spider mites to the dreaded root rot.
However, these problems can be easily avoided with the proper knowledge and techniques.
This section explores the common problems faced during Alocasia propagation and provides troubleshooting tips for a successful outcome.
Tips For Avoiding Common Mistakes In Propagation
Avoiding common mistakes in propagating your Alocasia plants can help improve your success rate and ensure healthy growth.
Here are some tips to keep in mind:
- Use a healthy stem cutting or leaf for propagation, free from disease and pests.
- Avoid cutting the stem too close to the mother plant, as this could damage the parent plant.
- Keep the container and water clean, changing the water every few days to prevent bacterial growth or mold.
- Be careful not to overwater the propagated plant, which can cause root rot and eventually kill it.
- Choose a suitable location with bright indirect light and high humidity to promote optimal growth.
- Gradually acclimate your plant to direct sunlight after transplantation, starting with brief periods of exposure before gradually increasing the duration.
- Provide proper nutrition through regular fertilization using appropriate fertilizer for Alocasia plants.
Solutions For Propagation Problems
If you encounter any issues while propagating your alocasia plant in water, don’t worry!
Here are some solutions:
- Yellowing leaves – This could be a sign of overwatering or underwatering. Adjust the amount of water accordingly and ensure the container has proper drainage.
- Root rot – If the roots appear black or mushy, this indicates root rot. Remove the cutting from the water immediately and trim off any affected roots. Report the cutting in fresh soil with good drainage.
- Fungus or mold growth – Keep an eye out for fungus or mold growth on the stem cutting or in the water. Potentially harmful microorganisms can cause damage to your plant and prevent successful propagation. Change the water frequently and add a small amount of hydrogen peroxide to help prevent fungal growth.
- Slow growth – If your alocasia cutting takes longer than expected to grow new roots, it may need additional nutrients. Consider adding fertilizer to provide more nutrients necessary for healthy growth.
Remember that not all propagation attempts will be successful; it’s essential to remain patient and persistent in caring for your plant until it grows in its new environment.
Troubleshooting Issues That Arise During Propagation
Propagation of Alocasia in water is generally a straightforward process, but some problems may arise.
Here are some common issues and tips to troubleshoot them:
- Stem Cutting Fails to Root: If the stem cutting fails to root after several weeks, try changing the water in the container. Ensure the water is clean and free from contaminants that inhibit root growth.
- Leaves Turning Yellow: Yellowing leaves could indicate the plant is not receiving enough light or nutrients. Move your propagation container to a brighter location, and consider adding plant food or fertilizer to the water.
- Mold Growth in Water: If mold starts growing in the water, it could mean too many bacteria present. Change the water regularly, and ensure you’re using a clean container for propagation.
- Leaves Not Growing: If your new plant has stopped growing altogether, it may be due to a lack of sunlight, overwatering or under-watering, low humidity levels, or insufficient nutrients in the water or soil.
- Root Rot: Excessive amounts of moisture around roots can cause fungal diseases like root rot, which can ruin your Alocasia plants within a few days if left unchecked. To prevent root rot, ensure proper drainage for excess water or monitor moisture content closely.
Final Thoughts
Propagating Alocasia in water is a simple and rewarding process that any plant lover can achieve.
Following the steps outlined in this complete propagation guide, you can successfully grow your Alocasia plants from stem or leaf cuttings.
These beautiful tropical plants will thrive indoors and outdoors with proper care and attention.
Remember to choose a healthy parent plant for propagation, gather the necessary materials, and take good care of your new baby plant once it’s transplanted into the soil.
Related Content
 Why Is My Alocasia Dripping Water? (An Easy Guide)
 How Often Should You Water Alocasia Plants (An Easy Guide)
 How To Save an Alocasia From Root Rot (A Complete Guide)
 How to Properly Prune Your Alocasia Plant (A Complete Guide)
 How to Identify and Fix an Overwatered Alocasia: An Easy Guide
 Why Are My Alocasia Leaves Curling? (10 Solutions)