Anthuriums can be grown in water by rinsing soil from roots, placing them in a glass vase with water, and keeping them in indirect light. Anthuriums are not hydroponic but can grow from a portion in water. Follow proper care instructions, as they are not adapted to watery environments.
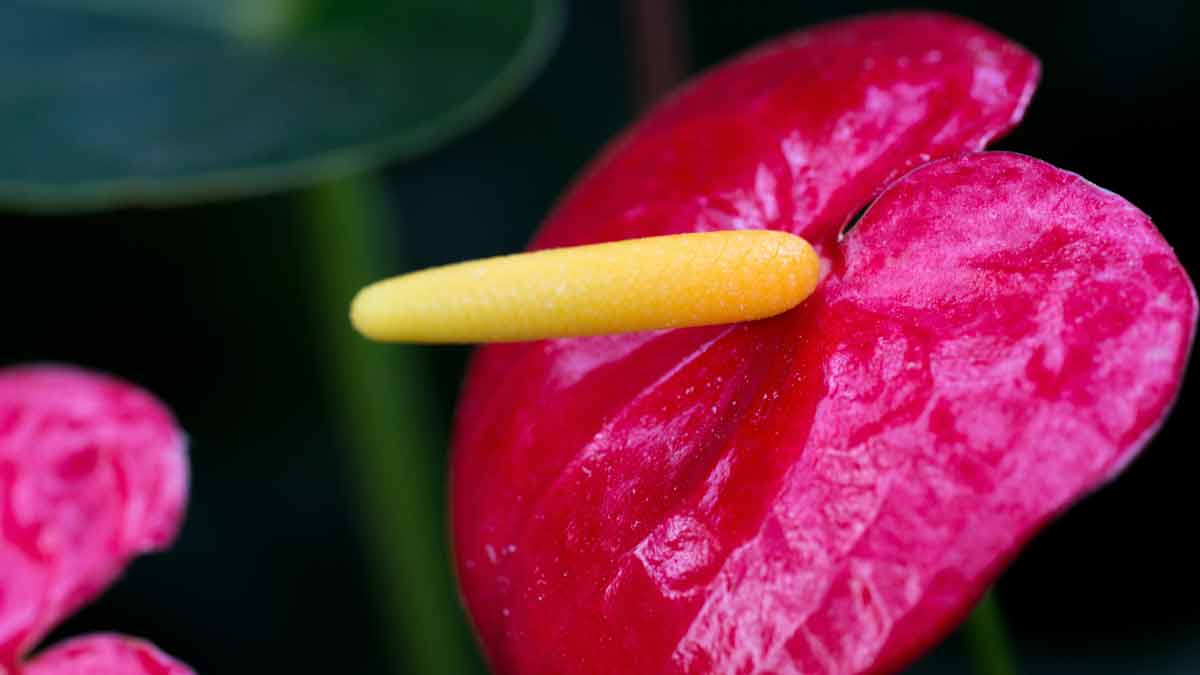
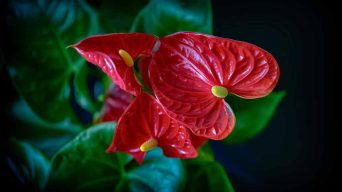
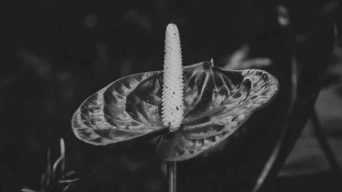
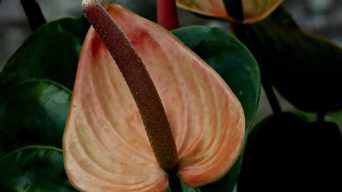
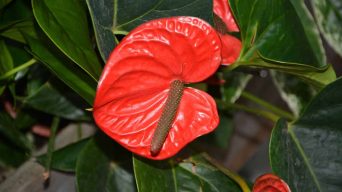
Anthurium plants, with their vibrant flamingo flowers and lush foliage, make a striking addition to any living space.
Although typically grown in soil, you might be surprised by the benefits of raising them hydroponically — free from pests, intricacies of potting mixtures, and practically fuss-free!
So, if you’re ready to take your plant care game up a notch and add an eye-catching element to your indoor garden or decor, let’s dive into this fantastic world of growing Anthurium in water.
Benefits Of Growing Anthurium In Water
Growing Anthurium in water offers numerous advantages, making it a popular option for plant enthusiasts.
By eliminating the need for soil, this cultivation method requires minimal maintenance while reducing the risk of pests and diseases.
Additionally, Anthurium plants grown in water showcase their striking beauty and vibrant colors, adding a touch of elegance to any indoor or outdoor space.
Soil-Free Planting
Growing Anthuriums hydroponically offers a soil-free planting experience that many plant enthusiasts find attractive and rewarding.
Soil can be messy, harbor pests, and even lead to poor root growth due to compaction or poor drainage.
Growing your Anthurium in water eliminates these issues while directly providing the proper nutrients to the roots for optimum growth.
In addition, soil-free planting allows for more control over the nutrient content in the water where your Anthurium is growing.
This precision makes it easier to tailor conditions for your plant’s specific needs based on factors such as its current growth stage or any possible deficiencies it may be experiencing.
As a result, you could see faster growth rates and healthier plants overall compared to traditional soil-based methods.
For instance, some indoor gardeners have observed stronger root systems among their hydroponic Anthuriums than those grown in potting mixtures, which can help improve overall plant health and blooming potential.
Low Maintenance
One of the most attractive benefits of growing Anthurium in water is its low-maintenance nature, making it ideal for busy plant enthusiasts or those new to indoor gardening.
The absence of soil eliminates the need for frequent repotting and reduces messy cleanups.
Moreover, if your anthurium plants receive adequate indirect sunlight and are placed in clear, clean containers filled with lukewarm water, they will thrive without much hassle.
Growing Anthurium in water enables easier monitoring of root health compared to those grown traditionally in soil.
This method requires only occasional maintenance tasks, such as changing the water when it becomes murky or adding liquid fertilizer during the growing season, which prevents root rot and encourages proper development.
Furthermore, having a transparent vase makes it simple to detect any issues early on – just ensuring regular observation is key!
Reducing Pest And Diseases
Growing Anthurium in water offers the added advantage of reducing the risk of pests and diseases for your beloved plant.
Traditional soil-based planting exposes the Anthurium to potential problems, such as fungus gnats or root rot, which can harm or even kill your plants.
By cultivating your Anthurium hydroponically, you eliminate these common issues associated with soil.
Growing Anthurium in water instead means many typical pest infestations can be avoided altogether.
Pests like spider mites and mealybugs thrive in high-humidity environments with dense foliage or damp soil – conditions that aren’t usually found when growing plants directly in water.
Additionally, submerging your plant’s roots helps prevent harmful fungi from taking hold and causing damage to its delicate root system.
To maintain optimal health for your water-grown Anthurium, it is essential to watch closely for any signs of distress or disease development.
If you do notice any suspicious growth patterns or discoloration on the leaves, take proactive measures by removing affected areas immediately and providing proper care based on expert recommendations specific to each issue.
This vigilant approach will ensure success with growing beautiful Anthurium plants indoors while minimizing pest invasions and disease outbreaks.
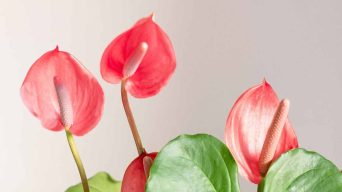
Enhances Beauty Of The Plant
Growing Anthurium in water is beneficial for its soil-free planting and low maintenance and enhances the beauty of your plant.
Without soil interference, you can see more clearly how beautiful the roots are as they grow and reach the bottom of the vase.
Plus, this method lets you showcase a stunning arrangement that attracts attention.
Anthuriums are known for their striking flowers in various colors and sizes.
Growing them in clear vases filled with warm water makes these blooms stand out even more, adding a touch of elegance to any space.
Plus, since Anthuriums bloom throughout the year under favorable conditions, you’ll have a continuous supply of beautiful flowers to admire!
How To Choose The Right Anthurium Plant
When selecting an Anthurium plant for growing in water, ensure it is healthy, has a robust root system, and has no yellow or brown leaves. Below you’ll find out how to prepare the plant for its new home.
Select Healthy Anthurium Plant
To ensure that your Anthurium plant thrives in water, starting with a healthy plant is crucial.
Look for plants with lush green leaves and no signs of yellow or brown discoloration.
Check the root system to ensure it’s not overcrowded, and avoid plants with mushy roots, as these may not survive transplanting.
When selecting an Anthurium plant, consider the variety you want to grow.
For example, if you’re looking for a large flowering plant, Anthurium Andraeanum is a good choice.
If you prefer smaller flowers but more ornate foliage, consider Anthurium Pedatum.
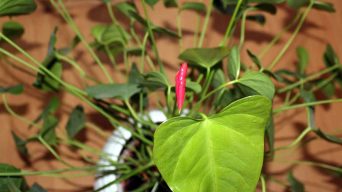
Once you’ve found your ideal Anthurium plant, carefully remove it from its pot and rinse off all soil from the roots using lukewarm water.
Trim any damaged or dead roots and cut off discolored leaves before planting in a clear vase filled with fresh water.
Check Root System
Before growing Anthurium in water, it is crucial to check the plant’s root system for its overall health.
Here are some steps to follow:
- Gently remove the plant from its soil by carefully loosening the roots.
- Check for any signs of damage or discoloration, such as brown or black roots, which may indicate root rot.
- Look for healthy, white roots that are firm and plump.
- Trim back any damaged or mushy-looking roots with clean pruning shears.
- If you notice any yellow or brown leaves on the plant, remove them as well.
By checking the root system before planting your Anthurium in water, you can ensure that it has a strong foundation for growth and will thrive in its new environment.
Avoid Plants With Yellow, Brown Leaves
Yellow and brown leaves are common signs of unhealthy Anthurium plants.
When selecting an Anthurium plant for water propagation, it is essential to avoid plants with yellow or brown leaves.
These discolored leaves indicate a nutrient deficiency, improper watering, or exposure to direct sunlight.
If you notice yellow or brown leaves on your Anthurium plant, remove any dead or damaged leaves and adjust the plant’s location as needed.
You can add liquid fertilizer to the water every two weeks to provide the nutrients for healthy growth.
Remember that prevention is always better than cure when it comes to Anthuriums.
Preparing The Anthurium Plant For Water
To prepare your Anthurium plant for water:
- Start by removing the soil and rinsing the roots thoroughly.
- Don’t forget to trim any dead or damaged roots and remove yellow or brown leaves before placing the plant in a clear vase filled with lukewarm water.
- For more tips on growing these beautiful plants in water, keep reading!
Remove The Soil
One crucial step in growing Anthurium plants in water is to remove the soil.
Soil-free planting provides numerous benefits, including reducing the risk of pests and diseases that can thrive in soil.
By removing the soil, you also reduce the maintenance needed for your plant, making it an excellent choice for those who want a low-maintenance indoor plant.
Remove the soil from your Anthurium plant from its pot and rinse any remaining soil off its roots under running water.
Be gentle when handling the roots to avoid damaging them, as they are essential for nutrient absorption.
Removing all remnants of the old potting mix will ensure that your new Anthurium home -a clear vase filled with lukewarm water- will remain free from debris and bacteria buildup while providing adequate oxygen levels necessary for root growth.
Rinse The Roots Thoroughly
Before planting your Anthurium in water, it is important to rinse the roots thoroughly.
Here are the steps:
- Gently remove the soil from around the plant’s roots.
- Hold the plant by its stems and gently rinse the roots under lukewarm running water until all traces of soil are removed.
- Inspect the roots for damaged or dead parts and trim them with sterilized scissors or garden shears.
- If you notice any brown or yellow leaves, remove them as well.
Rinsing the roots helps prevent soil particles from contaminating the water and ensures that your Anthurium has a healthy start to its new life in water.
Cutting Dead Or Damaged Roots
Before preparing your Anthurium plant for water propagation, cutting any dead or damaged roots is crucial.
Dead or rotten roots can lead to root rot and eventually kill the entire plant.
On the other hand, damaged roots may not absorb nutrients and water properly, which could cause stunted growth.
To cut dead or damaged roots:
- Begin by carefully removing as much soil as possible from around the root system.
- Gently loosen the soil with your fingers, careful not to damage any healthy roots.
- Once you have exposed the root system, use a clean pair of scissors or pruning shears to snip off any brown or mushy sections.
Remember that cutting too much of the root can also harm your plant’s growth.
Only remove what is necessary while ensuring enough healthy roots remain intact for optimal nutrient absorption.
After cutting away any dead or damaged portions of the root system, rinse them thoroughly before placing them in water for propagation.
This step ensures that no remaining soil particles contaminate your vase and its contents while providing a clean start for your new Anthurium plant.
Trimming Yellow Or Brown Leaves
To keep your Anthurium plant healthy and looking its best, it’s important to trim any yellow or brown leaves.
Here are the steps you should follow:
- Identify the affected leaves: Look for yellow or brown leaves on your Anthurium plant.
- Cut off the affected leaves: Carefully remove the damaged leaves at their base using a sharp, sterilized pair of scissors or pruning shears.
- Dispose of the cuttings: Place them in a plastic bag and dispose of them in the trash or compost bin.
- Monitor your plant: Keep an eye on your Anthurium plant to ensure that any remaining healthy foliage stays healthy.
Remember that yellow or brown leaves can indicate problems such as overwatering, underwatering, pests, disease, or environmental stress.
So trimming these unhealthy leaves not only improves the appearance of your plant but can also help prevent further damage and promote new growth.
Growing Anthurium In Water
If you’re interested in growing Anthurium plants, then growing them in water can be an exciting and unique way.
To get started, choose a clear vase and fill it with lukewarm water before submerging the roots and placing it in a well-lit area.
This method provides a simple yet effective way to cultivate these beautiful plants, which can thrive and flourish with proper care.
Pick A Clear Vase
When growing Anthurium in water, picking the right vase for the plant to thrive is essential.
Here are some tips on how to choose the perfect container:
- Opt for a clear vase: A transparent container allows you to monitor your Anthurium plant’s water level and root growth.
- Choose an adequate-sized container: The vase should be big enough to accommodate the Anthurium’s roots and hold enough water to submerge them.
- Consider the aesthetic appeal: Selecting an ornamental vase can add style to your space while displaying the plant beautifully.
- Avoid colored or opaque containers: Dark-colored vases prevent light from reaching the roots, hindering photosynthesis, while opaque containers obstruct visibility for monitoring root growth.
Fill Vase With Lukewarm Water
When growing an Anthurium plant in water, filling the vase with lukewarm water is important.
This is because cold or hot water can cause damage to the roots or shock the plant, leading to stunted growth or death.
Lukewarm water ensures the temperature is just right for your plant to thrive.
Another benefit of using lukewarm water is that it can help dissolve any minerals present in tap water.
These minerals can build up over time and cause root blockages, leading to root rot and other issues.
By using lukewarm water, you’re helping your Anthurium plants stay healthy and grow strong.
If you’re not sure about the temperature of your tap water, a good rule of thumb is to let it sit out overnight before filling your vase.
This allows any chlorine or other chemicals your local utility company added to evaporate, making it safer for your plants.
Submerge The Roots In Water
Submerging the Anthurium plant’s roots in water is crucial when growing the plant hydroponically.
Follow these steps:
- Pick a clear vase: Choose a vase that allows plenty of light to reach the roots to encourage growth.
- Fill the vase with lukewarm water: Ensure the water level is enough to cover the plant’s entire root system.
- Submerge the roots in water: Gently place the Anthurium plant’s roots into the water, ensuring they are fully submerged.
- Place the vase in a bright location: The plant should be positioned in an area with plenty of bright indirect light.
Place The Vase In A Bright Location
Anthurium plants need a lot of light to grow and produce flowers, so placing them in a bright location is important.
However, direct sunlight can damage the plant, especially if it’s new cuttings.
Therefore, it is recommended to position your Anthurium in a spot that receives bright indirect light throughout the day.
A south-facing window with sheer curtains or an east or west-facing window that doesn’t receive direct sunlight is ideal.
If you’re growing your Anthurium in water, placing the vase near natural light sources such as windows or skylights will help provide adequate lighting for optimal growth.
Using artificial grow lights can benefit indoor setups without access to natural lighting.
Remember that the brightness of light affects different varieties of Anthurium differently: “Anthurium clarinervium” prefers low-light conditions, while “Anthurium scherzerianum” requires bright indirect sunlight.
Knowing what type of Anthurium you have will allow you to adjust its placement accordingly and ensure healthy growth and blooming.
Maintaining Anthurium Plants In Water
If you want to keep your anthurium plant in water and maintain its health, it’s essential to take care of it properly.
Regular maintenance includes:
- Frequently changing the water.
- Removing dead leaves or stems.
- Providing it with liquid fertilizer when necessary.
By following these simple steps, you can ensure that your anthurium plant thrives in its water environment.
Changing Water
It is essential to change the water regularly when growing Anthurium in water.
This will help prevent algae or bacteria growth, which can harm your plant.
You should aim to change the water every two weeks, but you may need to do it more often if you notice any discoloration or odor.
When changing the water, be sure to use lukewarm water that has been allowed to sit for at least 24 hours, as this will help remove any chlorine or other chemicals.
Another important thing to remember when changing the water is not to disturb the roots too much.
While it’s okay to swirl the vase around a bit gently, you don’t want to uproot your Anthurium and cause damage.
Remove any dead leaves or stems floating in the old water before replenishing them with fresh water and liquid fertilizer.
Adding Liquid Fertilizer To Water
Adding liquid fertilizer to water is essential in maintaining the health and growth of Anthurium plants grown in water.
Here are some crucial points to keep in mind:
- Use a balanced, water-soluble fertilizer: A 20-20-20 ratio fertilizer is ideal for Anthurium plants grown in water. This provides nutrients such as nitrogen, phosphorus, and potassium for healthy growth.
- Follow the manufacturer’s instructions: The amount of fertilizer needed depends on the plant’s size and the fertilizer you use. Always follow the manufacturer’s instructions to avoid over-fertilizing or under-fertilizing your plants.
- Add fertilizers during water changes: When changing the water in your vase or container, add the required amount of fertilizer to that fresh new water instead of adding it directly to the old one.
- Be careful not to over-fertilize: Over-fertilization can lead to root burn and other issues, so only recommended amounts must be used.
- Monitor plant growth for signs of fertilization needs: Yellowing leaves may indicate a lack of nutrients, while excessively dark green foliage may suggest too much fertilization.
Removing Dead Leaves Or Stems
Removing dead leaves regularly or stems from your Anthurium plant to maintain its health and appearance is important.
Dead foliage can attract pests and diseases, as well as prevent new growth from appearing.
Additionally, cutting off wilted or yellowing leaves can help redirect the plant’s energy toward healthy growth.
To remove dead leaves or stems, use a sharp pair of scissors or pruning shears to make a clean cut near the base of the affected area.
Be sure not to damage any surrounding healthy foliage in the process.
If you notice any signs of infection on the removed tissue, dispose of it immediately away from other plants to avoid spreading the disease.
Regularly removing dead foliage will keep your Anthurium looking beautiful and promote overall plant health and longevity.
Watch For Pests Or Diseases
Anthurium plants in water are prone to pests and diseases that can affect their growth and survival.
To keep your plants healthy and beautiful, it’s important to watch out for these common issues:
- Spider mites: These tiny pests can be found on the undersides of leaves, where they suck sap from the plant. Look for fine webs and stippling on the leaves. To treat spider mites, use insecticidal soap or oil.
- Mealybugs: These white, fuzzy insects suck sap from the plant and produce honeydew, which attracts ants. Look for cottony masses on the leaves or at the base of the plant. To treat mealybugs, use insecticidal soap or alcohol.
- Scale insects: These small, shell-like bugs attach themselves to stems and leaves, sucking sap from the plant. Look for brown bumps on the plant that don’t rub off easily. To treat scale insects, use insecticidal soap or oil.
- Bacterial blight: This disease causes brown spots on the leaves and stems, which eventually turn black and mushy. It is caused by overwatering or poor drainage. To treat bacterial blight, remove affected leaves and stems and improve drainage.
- Root rot: This disease is caused by overwatering or allowing standing water in the container. The roots become mushy and discolored, leading to wilting of the plant. To treat root rot, remove affected roots and improve drainage.
Final Thoughts
Growing Anthurium in water is an excellent way to enjoy the plant’s beauty without the hassle of soil maintenance.
With proper care, your Anthurium will thrive and enhance any room it adorns.
Remember to choose healthy plants with a robust root system, and always rinse off their roots before submerging them into lukewarm water.
Watch for common issues like root rot or pest infestations and adjust accordingly.
Enjoy the benefits of this low-maintenance, soil-free planting method that effortlessly adds life and decoration to your space!
Related Content
 How to Care for Anthurium Indoors: A Beginner’s Guide
 How To Save an Anthurium From Root Rot (A Complete Guide)
 How To Fix a Leggy Anthurium (A Complete Guide)
 Underwatered Anthurium: How To Identify, Treat and Prevent It
 Why Is My Anthurium Flower Turning Brown? Causes & Solutions
 Fixing Brown Spots on Anthurium Leaves: Causes and Solutions