Key Takeaways
- Echeveria is a stunning and low – maintenance succulent that can be grown from seed with the proper techniques.
- To successfully grow Echeveria from seed, it’s important to choose fresh seeds, use a well-draining soil mix, maintain the proper temperature and lighting conditions, and water and fertilize appropriately.
- Providing shade during the hottest part of the day or adjusting lighting as needed can promote healthy growth, while avoiding overwatering can prevent fungal infections.
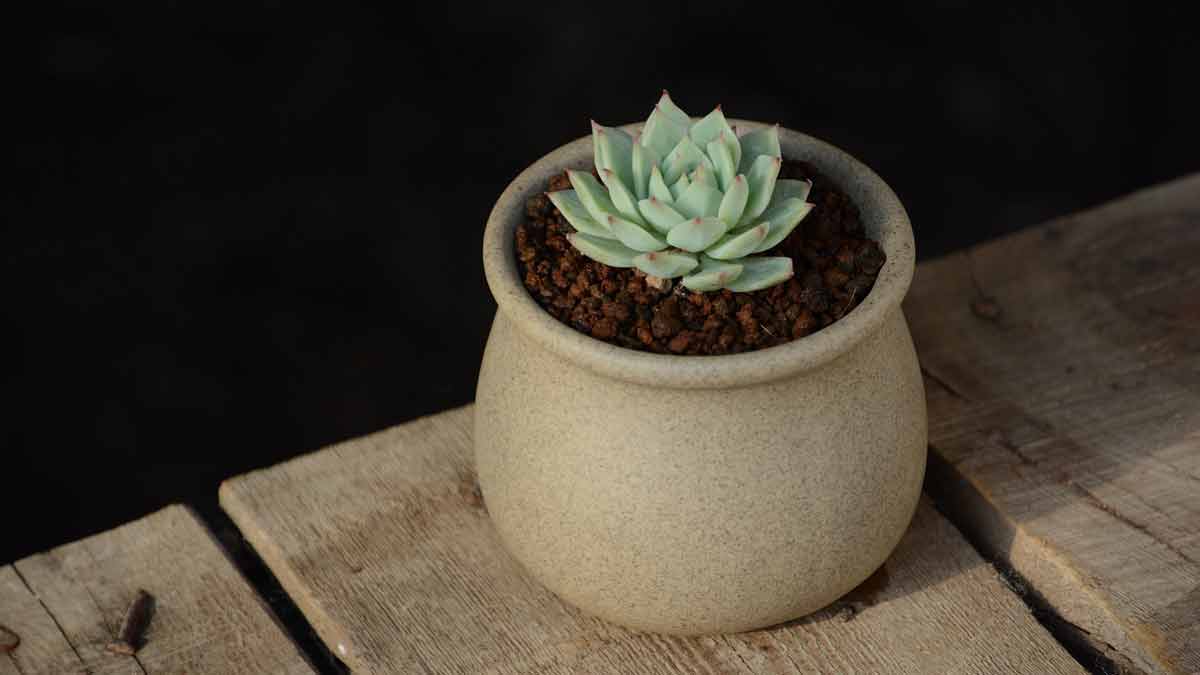
Echeveria is a stunning, rosette-forming succulent that adds charm and elegance to any indoor or outdoor garden.
Growing Echeveria from seed can be rewarding and cost-effective for plant enthusiasts who want to expand their collection.
This guide will walk you through understanding the Echeveria growth process, choosing the right seeds, mastering planting techniques, and providing optimal care for your new plants.
Understanding Echeveria And Its Growth Process
Echeveria is a succulent plant that falls under the Crassulaceae family. It has a distinct lifecycle that includes periods of dormancy in winter and active growth in summer.
Overview Of Echeveria
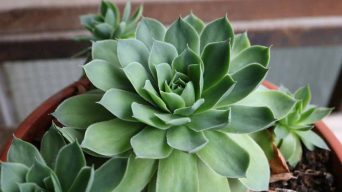
Echeveria, a popular and charming genus of flowering succulent plants, hails from the family Crassulaceae.
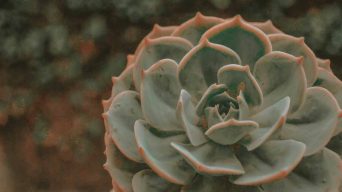
These aesthetically pleasing plants exhibit striking rosette-shaped leaves ranging from light green to vibrant shades of pink, red, and purple.
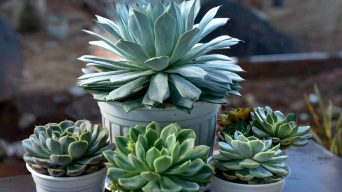
One notable feature of Echeveria is its ability to be propagated through various methods such as seeds, offsets (or “pups”), or individual leaves.
Growing Echeveria from seed can be exciting as you witness the lifecycle firsthand – from germination to maturation – culminating in an eye-catching addition to your home garden or indoor plant collection.
Lifecycle Of Echeveria
The lifecycle of Echeveria is an important aspect to understand for plant owners who wish to grow and propagate these stunning succulents successfully.
To help you grasp the various stages in the life of an Echeveria, here’s a breakdown of its lifecycle:
- Seed germination: Fresh Echeveria seeds are sown in a well-draining soil mix, where they will begin to germinate under proper temperature and lighting conditions.
- Seedling growth: Providing adequate water and nutrients encourages healthy root and foliage development as seedlings emerge.
- Vegetative stage: During this period, the young Echeveria plant grows leaves and forms its signature rosette shape while focusing on photosynthesis and overall growth.
- Flowering stage: This phase sees the development of stems that produce beautiful flowers, typically occurring during growing seasons when proper care is provided.
- Pollination and seed set: After flowering, pollination occurs naturally or with human intervention, forming new seeds.
- Seed dispersal: Mature plants release their seeds into their surroundings through natural processes such as wind or water action or manual collection by plant enthusiasts for future propagation efforts.
- Death and rejuvenation (Polycarpic): Echeverias are polycarpic plants that can flower multiple times throughout their lives, ensuring a constant rejuvenation cycle. As old leaves die off, new ones take their place.
Factors Affecting Echeveria Germination From Seed
Several factors play a crucial role in the successful germination of Echeveria seeds, and understanding these elements will significantly improve your chances of growing thriving plants.
One such factor is the freshness of the seeds.
Fresh seeds greatly impact their germination ability, whereas older seeds may not thrive or produce satisfactory results.
The optimal environmental conditions for Echeveria seed germination include maintaining appropriate temperature and humidity levels and ensuring adequate lighting conditions.
Ideal temperatures for germinating succulent seeds range between 65-75°F (18-24°C) with consistent moisture levels to support growth without causing root rot due to overwatering.
Another technique that promotes successful Echeveria seed germination involves using gibberellic acid – a plant hormone that stimulates growth and development.
Applying this hormone to your echeveria laui seeds before sowing can enhance their sprouting process and overall progress; however, use it responsibly according to specific guidelines found on its packaging.
Step-by-Step Guide To Growing Echeveria From Seed
To start growing Echeveria plants, select high-quality seeds from a trustworthy source.
To ensure proper drainage, create the soil mixture by mixing potting soil with perlite or sand.
Then, sow the seeds on the soil’s surface in a small container before covering them with plastic to encourage germination.
Choosing The Right Seeds
When choosing Echeveria seeds, it’s important to consider the particular variety you’re interested in.
Some species may have distinct color variations or unique growth patterns that make them stand out.
When selecting seeds, always opt for fresh ones, as they are more likely to germinate successfully.
Look for plump, firm seeds with no signs of damage or discoloration.
Remember to prioritize quality over quantity when choosing Echeveria seeds.
A few healthy and viable ones can easily flourish into beautiful plants with proper care and attention.
Preparing The Soil And Planting Container
Before sowing your Echeveria seeds, ensure you have the right soil mix and planting containers.
We recommend using a well-draining potting mix with added sand or perlite to increase drainage for optimal results.
Prevent excessive watering by letting the soil dry thoroughly before the next watering.
As for the container, choose a small pot with drainage holes to prevent waterlogging.
When planting your Echeveria seeds, gently press them into the soil surface without burying them too deep – they should be only partially covered by soil.
Ensure there is enough space between each seed so the seedlings will not compete for resources as they grow.
Proper Sowing Techniques
To ensure the successful growth of Echeveria from seed, it’s essential to follow proper sowing techniques.
Here are the steps you need to take:
- Choose a well-draining soil mix that is suitable for succulent plants.
- Fill a small pot or container with the soil mix, leaving about an inch of space from the top.
- Sprinkle Echeveria seeds on the soil surface, ensuring even spacing between them.
- Cover the seeds with a thin layer of soil mix (about 1/8 inch).
- Mist the surface gently with water using a spray bottle until moist but not soaking wet.
- Place the pot or container in a warm, bright location that receives indirect sunlight (a south-facing window is ideal).
- Maintain a constant temperature of around 70-75°F (21-24°C) to promote germination and growth.
- Keep the soil moist by misting regularly with water, ensuring not to overwater as this can cause root rot.
By following these proper sowing techniques, you can increase your chances of successfully growing Echeveria from seed and enjoying beautiful mature plants in no time!
Caring For Echeveria Seedlings
To ensure the best growth for your seedlings, it is recommended to place them in a well-lit area with temperatures between 65-75°F (18-24°C) during the day and cooler temperatures at night.
Maintaining Optimal Temperature And Lighting Conditions
Maintaining optimal temperature and lighting conditions is crucial for successful Echeveria growth.
Here are some tips to ensure your seedlings thrive:
- Provide a warm environment: Echeverias prefer temperatures between 65-80°F. Keep them away from cold drafts and ensure they are not exposed to temperatures below 50°F.
- Give them enough light: Echeverias require bright, indirect sunlight for several hours daily. In winter, 6 hours of bright light is sufficient, while in spring and summer, they need 8-12 hours of indirect sunlight. Use grow lights if natural light is insufficient.
- Adjust lighting as needed: If you notice your seedlings starting to stretch or lean towards the light source, adjust their position or increase the amount of light they receive.
- Allow for shade: While Echeverias require bright light, too much can be harmful. Provide shade during the hottest part of the day or move them away from the intense afternoon sun.
- Monitor temperature changes: Temperature changes can stress Echeveria plants. Avoid placing them near windows or doors where abrupt temperature changes can occur.
Proper Watering And Fertilizing Techniques
Proper watering and fertilizing techniques are crucial to the growth and health of echeveria plants.
Here are some tips to keep in mind:
- Watering: Echeverias should be watered thoroughly but infrequently, as overwatering can lead to root rot. During the growing season, water your echeverias when the soil is completely dry. In winter, reduce watering to every three weeks to avoid excess moisture.
- Fertilizing: Echeverias benefit from fertilizer during their active growing season. A diluted high-phosphorus formula is recommended for flowering. Be sure not to over-fertilize, as this can cause damage to the plant.
- Pests: Overwatering can attract pests such as mealybugs, harming your Echeveria. Be sure to follow proper watering techniques and inspect your plant regularly for signs of infestation.
Preventing Fungal Infections
Fungal infections are a common problem in Echeveria seedlings and can quickly become fatal if left untreated.
To safeguard plants from fungal infections, it is crucial to refrain from overwatering, as it may result in an accumulation of excessive moisture in the nooks of the stem.
This excess moisture creates an environment perfect for fungi to grow and thrive.
Another thing you can do to prevent fungal infections is to check your Echeveria seedlings daily for signs of disease or poor growth.
New leaves in Echeveria seedlings are particularly prone to fungal infection, so they must be checked regularly for any signs of wilted or discolored leaves.
Implementing these simple preventative measures into your Echeveria seedling care routine can help ensure healthy plant growth and protect against potentially fatal fungal infections.
Transplanting And Harvesting Echeveria Seedlings
When transplanting Echeveria seedlings, wait until they have grown a few true leaves, usually after 2-3 months.
Select a pot slightly bigger than their current container and use soil that drains well.
When To Transplant Seedlings
Transplanting your Echeveria seedlings is an important step in their growth process.
Once they have developed a strong root system, you can start thinking about replanting them in larger pots or outdoors.
A good rule of thumb is to wait until the seedlings have grown at least two sets of true leaves before transplanting them.
When transplanting your Echeveria seedlings, it’s important not to disturb their roots too much and always handle them gently.
Loosen up any tightly packed soil around the roots without damaging them, and place each plant into its new pot with fresh potting mix.
Ensure drainage holes at the bottom of your pots allow water to flow through freely not to drown your plants’ delicate roots.
Choosing The Right Pot And Soil
Choosing the right pot and soil is essential for the successful growth of Echeveria seedlings.
When selecting a pot, choosing one with good drainage holes that will allow excess water to escape easily is important.
Pots with an average diameter of four inches will provide enough space for healthy growth.
Tapping the pots against a hard surface before planting is also recommended to encourage soil settling and remove any air pockets.
Tips For Successful Transplantation
To ensure the successful transplantation of your Echeveria seedlings, keep the following tips in mind:
- Choose the right pot size: Select a pot slightly larger than the plant’s root ball to give it enough room to grow.
- Use well-draining soil mix: Echeveria plants prefer well-draining soil, so use a mixture of regular potting soil and sand or perlite to improve drainage.
- Transplant during the growing season: The best time to transplant Echeveria seedlings is during their active growing season in spring or summer.
- Water thoroughly after transplanting: After planting your seedlings, water them thoroughly to help settle the soil and reduce transplant shock.
- Keep out of direct sunlight: Avoid placing your seedlings in direct sunlight for a few days after transplanting, as this can cause stress.
- Maintain optimal temperature and humidity levels: Keep your newly transplanted seedlings in an area with temperatures between 65-75°F and humidity levels around 30-40%.
- Add extra light source if necessary: In darker locations, introduce an additional light source, like artificial lighting, to promote healthy growth.
Harvesting Seeds For Future Growth
Once your Echeveria has matured and produced blooming flowers, it’s time to harvest the seeds for future growth.
Collecting fresh seeds is important as old ones may not germinate well.
Look for ripe seed pods that are dry and brown before gently shaking or tapping them over a container to release their small black seeds.
Once collected, store the seeds in a cool, dry place until you’re ready to plant them.
Common Mistakes To Avoid And Troubleshooting Tips
To ensure successful Echeveria seed germination, avoiding common mistakes such as over or underwatering, improper lighting conditions, and pest and disease control issues is important.
If any problems arise during the growing process, don’t worry – we’ve included troubleshooting tips to help you navigate them.
Overwatering And Underwatering
One of the most common mistakes that plant owners make when growing Echeveria from seed is overwatering.
Overwatering can lead to root rot and ultimately cause the plant to die.
On the other hand, underwatering can also be an issue for Echeveria plants. If not given enough water, the leaves may appear wrinkly and shriveled.
To maintain optimal health for your Echeveria plant, strike a balance between these two extremes.
Regularly check your soil moisture levels and adjust your watering schedule as needed.
By doing so, you will help ensure that your succulent grows healthy and strong without risking damage caused by over or under-watering.
Proper Lighting Conditions
Echeverias are sun-loving plants that require plenty of sunlight to thrive.
When growing Echeveria from seeds, it is essential to provide good lighting conditions for successful growth.
The ideal amount of sunlight for Echeverias is at least 4-5 hours each day.
It’s important to note that not all varieties of Echeveria thrive in full sun, and some may need partial shade during scorching summer months.
Keeping the plant between 70° and 80° temperature range will also help them grow healthy leaves while preventing damage due to too much heat or cold temperatures.
Pest And Disease Control
Pest and disease control is essential when growing Echeveria from seed. Pests like spider mites, mealybugs, and aphids can damage or kill young plants.
To prevent infestation, it’s important to use sterile soil and containers, avoid overwatering and overcrowding the plants, monitor regularly for signs of insects or diseases, and take action promptly if necessary.
Insecticidal soap or neem oil can help eliminate pests while improving air circulation by removing infected leaves can help with disease control.
Proper care, including monitoring growing conditions such as light exposure, is crucial in preventing pest and disease issues when growing Echeveria from seed.
Final Thoughts
Growing Echeveria from seed is an exciting and rewarding experience for any plant owner.
Following the step-by-step guide outlined in this article, you can successfully grow your Echeveria plants right at home.
Remember to choose the right seeds, correctly prepare the soil and planting container, and provide optimal care throughout every growth stage.
Related Content
 How to Grow and Care for Echeveria Plants (The Ultimate Guide)
 How Fast Do Echeveria Grow and How To Grow Them Faster
 How To Propagate Echeveria Plants (A Complete Guide)
 How Big Can Echeveria Succulents Grow? Size & Growth Guide
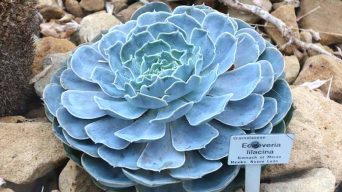 Echeveria Lilacina ‘Ghost Echeveria’ Care and Propagation Guide
 How Often Should You Water Echeveria Plants (An Easy Guide)