
Key Takeaways
- Four main methods for propagating echeveria plants are separating offsets, leaf cuttings, stem cuttings, and seed propagation.
- Each method requires specific steps and proper care to ensure the successful growth of the new plants.
- Choosing healthy leaves or stems and preparing well-draining soil mixtures are important factors for effective propagation. Regular monitoring of watering schedules and lighting conditions is crucial in nurturing optimal root growth.
- Propagating Echeveria plants can be rewarding, allowing you to expand your collection effortlessly while adding beauty to any indoor space.
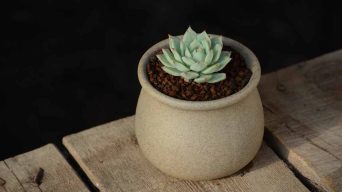
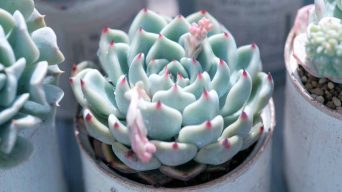
Echeveria plants are popular among succulent enthusiasts with their beautiful rosette shapes and various colors.
If you want to expand your collection or share the joy of these fascinating plants with others, you’ll be pleased to learn that propagating.
Echeveria is an easy and rewarding process.
Here we’ll explore four different methods for successful echeveria propagation: separating offsets, leaf cuttings, stem cuttings, and growing from seeds.
How To Propagate Echeveria By Separating Offsets
If you want to expand your collection of echeveria plants, separating offsets is an easy and effective way to propagate them.
Here’s how to do it.
Identifying Offsets
Offsets, also known as “chicks” or “pups,” are mini replicas of the parent Echeveria plant that grow at the base.
They usually appear as small clusters of rosettes with roots emerging from their stems.
To identify offsets, look closely at the mother plant and observe any growths around its base.
If multiple rosettes grow outwards instead of upwards, those are likely offsets.
Knowing the right time to divide offsets for the best results is crucial.
Ensure they’re big enough (minimum of one-fourth of the parent’s size), and wait until spring or summer to carefully separate them from the root system to prevent any harm to the plants.
Preparing The Soil And The Pot
To prepare the soil and pot for propagating echeverias, you’ll need to ensure the soil is moist and well-draining.
It’s recommended to use a ‘Cactus & Succulent’ compost mix similar to what the original plant was grown in.
Choose one with good drainage holes for the pot to allow excess water to drain out.
Proper soil and pot combination will create optimal growing conditions for your propagated echeveria plantlet!
Separating And Planting The Offsets
First, to propagate Echeveria through separating offsets, identify the baby plants nestled against the mother rosette.
It’s recommended that you wait until the offsets are about half the size of the parent plant before removing them.
Offset division is best done in spring or summer when the offshoots are at least a quarter of their mother plant’s size.
Once separated, prepare a suitable pot and soil mix for your new plants.
Use well-draining soil to avoid root rot and ensure sufficient water drainage, crucial for succulent growth.
Plant each offset at a depth that covers its base with soil while keeping its leaves above ground level.
Remember to maintain proper lighting conditions during propagation, avoiding exposing your new plants directly under sunlight; opt instead for bright but indirect light sources, as too much direct sun could damage young Echeverias’ tender foliage.
How To Propagate Echeveria By Leaf Cuttings
If you want to propagate Echeveria through leaf cuttings, you must choose healthy leaves and prepare an appropriate potting mix.
This is the most accessible and commonly used method, and we’ll guide you through the process. Keep reading to learn more!
Selecting Healthy Leaves
Selecting healthy lower leaves from mature plants to propagate Echeverias through leaf cuttings is crucial.
Choose plump and fleshy leaves with no visible scars or signs of damage.
When selecting leaves from a parent plant, make sure to choose those that are halfway along the stem.
These leaves tend to be larger and more mature than those near the top of the plant.
Avoid taking too many leaves from one plant at once, as this can stunt its growth.
Preparing The Potting Mix
Having the right potting mix is crucial when propagating echeveria plants.
As these succulents require excellent drainage, it’s best to use a ‘Cactus & Succulent’ labeled potting mix.
You can also create your own well-draining potting mix by mixing perlite, coarse sand, and cactus soil in equal parts.
This will ensure that water passes through quickly and doesn’t pool at the bottom of the container, which can cause root rot.
Additionally, moisten the prepared potting mix before planting any cuttings or offsets.
Planting And Caring For The Leaf Cuttings
To propagate Echeverias from leaves, you need to select healthy leaves that are free of any blemishes or damage.
Gently twist off the leaf from the stem, ensuring it’s a clean pull with no residue left on the stem.
Lay your chosen leaves on top of well-draining soil and water sparingly, only enough to moisten the soil.
It’s important not to overwater your leaf cuttings, as too much moisture can cause root rot.
The ideal location for these plants is in areas with bright but filtered light, such as near a window that lets in indirect sunlight.
How To Propagate Echeveria By Stem Cuttings
If you want to grow more Echeveria plants, cut a healthy stem from your existing plant, let it dry for a day or two, dip the cut end in rooting hormone, and then plant it in soil that drains well.
This process of stem cutting propagation can help expand your plant collection.
Selecting Healthy Stems
When selecting healthy stems for propagating Echeveria succulents, choosing plants with branches or stems that are not too thin or weak is essential.
Look for stems that have at least three sets of leaves and are at least four inches long.
Another tip is to select a stem that has grown a rosette at its end, indicating the plant’s health and vigor.
Choosing a healthy stem increases your chances of success when propagating Echeveria through stem cuttings.
Preparing The Soil And The Pot
Preparing the soil and pot is crucial for successful echeveria propagation.
Echeverias require well-draining soil to prevent root rot, so it’s important to choose a potting mix specifically designed for succulents or create your own by mixing sand, perlite, and regular potting soil.
When selecting a pot, choose one slightly larger than the offset or stem cutting you’re planting.
It’s also essential to ensure proper drainage in the pot by adding rocks or gravel at the bottom before filling it with soil.
This will help excess water drain away from the roots of your new plant.
Planting And Caring For The Stem Cuttings
Select a healthy stem from the parent plant to propagate your echeveria plant using stem cuttings.
Use a sharp and sterile knife or scissors to make a clean cut at the base of the chosen stem.
Allow it to dry for about two days before planting in a well-draining soil mix.
It is important to note that bright but indirect sunlight is preferred over direct sunlight when propagating Echeveria using stem cuttings.
Also, avoid overwatering, which can cause root rot and damage the cutting.
How To Propagate Echeveria By Seed
If you want to start from the beginning, propagating Echeveria by seed is a great option.
Keep reading to learn how to do it!
Harvesting Seeds
Echeveria plants can also be propagated from their seeds, a simple process.
To start, wait for the flowers to bloom and develop seed pods.
Once the pods have matured and turned brown, carefully remove them from the plant.
You can then extract the tiny black or brown seeds from inside each pod by gently rubbing them with your fingertips.
Once you’ve collected your echeveria seeds, prepare a potting mix of well-draining soil and sand.
Fill a shallow container or seed tray with this mixture and then scatter the seeds on top of it.
Cover them lightly with a thin layer of soil but don’t bury them too deep, as they need light to germinate properly.
Water them thoroughly but avoid saturating them so they are moist and not soggy.
Preparing The Soil And The Pot
To ensure the successful propagation of Echeveria, it’s important to prepare the soil and pot before planting.
When choosing a pot, it should be large enough to accommodate the plant’s roots while providing adequate drainage.
The soil mix used for Echeveria should be labeled as ‘Cactus & Succulent’ and have good drainage properties to prevent root rot.
Before planting, ensure the plant is hydrated for 24 hours by giving it a good soak in water.
This will help prevent transplant shock and promote healthy root growth.
Once hydrated, carefully remove the plant from its current container or parent plant and gently brush away any excess soil from its roots.
Then, place the plant in a well-draining potting mix with ample space around it for future growth.
Planting And Caring For The Seedlings
To propagate Echeveria plants through seeds, harvest them from the mother plant and prepare a suitable potting mix.
Once your soil is ready, sow the seeds on top of it and cover them with a thin layer of sand or fine gravel.
After that, lightly water the soil using a spray bottle until it’s moist but not soaked.
Keep your container in indirect sunlight since the direct sun can scorch young Echeverias.
Check regularly for sprouts – typically within two to four weeks – while adjusting lighting conditions as needed.
Once they grow their second set of leaves, transplant them into individual pots filled with well-draining soil mix labeled for succulents.
Tips For Echeveria Propagation Success
To propagate Echeveria successfully, ensure it gets enough sunlight and water.
Avoid over-fertilizing and take measures to prevent pests and diseases.
Providing Adequate Light And Water
Echeveria plants require proper lighting for growth, and indirect sunlight is the best choice.
Bright, direct sunlight may cause leaf burn or scorching.
Proper watering is also crucial when propagating Echeveria plants.
Overwatering can lead to root rot and attract pests such as mealybugs. When rooting new cuttings, keeping the soil moist but not soggy is essential.
Water sparingly until roots grow – usually takes about 2-3 weeks.
After that period, allow the soil to dry out before watering again.
Avoiding Over-fertilization
Over-fertilizing your echeveria plants can cause more harm than good.
These succulents are not heavy feeders and require minimal nutrition to thrive.
Applying too much fertilizer can damage the plant’s roots, leading to stunted growth or even death.
During the active growing period (spring and summer), you may occasionally apply a balanced liquid fertilizer at half-strength, diluted with water.
However, be sure never to fertilize a dry plant as it can lead to chemical burns.
During the dormant period (winter), it’s best to avoid fertilizing altogether, as overfeeding during this time can put unnecessary stress on the plant, making it prone to disease and rotting.
Taking Precautions Against Pests And Diseases
Pests and diseases are a common problem for echeverias, but there are some precautions you can take to keep them at bay.
Firstly, monitoring your plants regularly for any signs of infestations or diseases is important.
One effective way to prevent pests is by keeping the area around your plants clean and tidy.
This means removing dead leaves or debris that may attract insects or harbor diseases.
You can also introduce beneficial insects like ladybugs or lacewings into your garden as they feed on common pests like aphids.
Additionally, avoid overwatering your echeverias, as this can create conditions that promote fungal growth and disease.
Ensuring Proper Temperature And Humidity
Echeverias are a type of succulent that thrives in hot and dry conditions.
They do not do well with cold temperatures or drafts, so keeping them away from air conditioning vents and windows during the winter months is essential.
When it comes to humidity, too much can cause root rot and lead to the demise of your echeveria plant.
It’s best to wait until the soil has completely dried before watering again.
This allows for proper drainage and prevents excess moisture buildup around the roots.
If you live in a particularly humid area, consider using a fan or dehumidifier near your plant to help regulate moisture levels.
Final Thoughts
Propagating Echeveria plants is an easy and satisfying process with the proper techniques.
Whether by separating offsets, leaf or stem cuttings, or seeds, you can multiply your beloved succulent collection in no time.
Remember to care for the new plant growth as they thrive in well-draining soil and bright sunlight.
Avoid overwatering and fertilizing while keeping pests at bay.
Related Content
 How To Grow Echeveria Plants From Seeds (A Complete Guide)
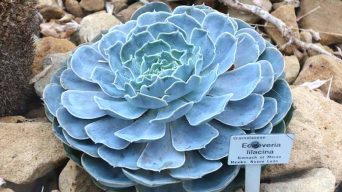 Echeveria Lilacina ‘Ghost Echeveria’ Care and Propagation Guide
 How Often Should You Water Echeveria Plants (An Easy Guide)
 How to Grow and Care for Echeveria Plants (The Ultimate Guide)
 Repotting Echeveria Plants (Everything You Need to Know)
 How Much Light Do Echeveria Plants Need for Optimal Growth?