Key Takeaways
- Repotting Echeveria plants is important for optimal growth and overall health, preventing overcrowding and root rot, and enhancing their aesthetics.
- Signs that your Echeveria needs repotting include overcrowding, root-bound plants, wilting or yellowing leaves, and slow growth.
- When repotting, choose the right pot one size larger than its current container with adequate drainage holes at the bottom. Use a quality soil mix that drains well, and add perlite or sand to improve airflow around roots. Be sure to prepare the plant by hydrating it before repotting and adjusting watering habits after transplanting.
- Proper aftercare involves appropriate watering and fertilizing techniques, avoiding transplant shock, and maintaining ideal sun exposure levels for your specific Echeveria type. Finally, pruning to ensure healthy new growth while addressing any pests or diseases that may arise in a timely fashion.
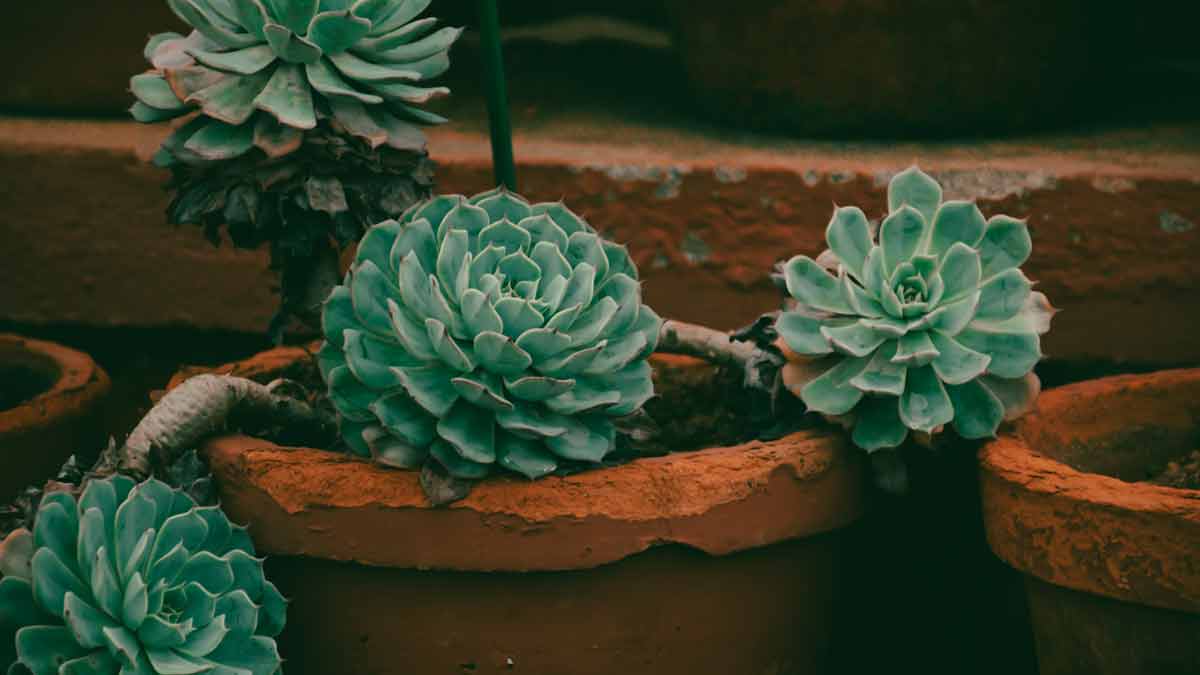
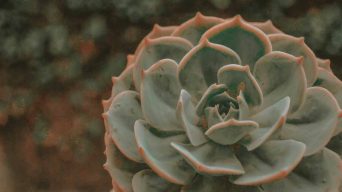
Echeveria plants, a popular and stunning genus of succulents, are known for their beautiful, rosette-shaped leaves and low-maintenance care requirements.
However, repotting becomes necessary at certain stages in their life cycle to ensure these striking plants’ continued health and growth.
In this guide to repotting Echeveria, we will explore the importance of this process, identify key signs that indicate it’s time to repot your plant and provide step-by-step instructions on how to do so successfully.
Why Repotting Echeveria Is Important
To ensure your Echeveria plant grows well and stays healthy, it’s important to repot it.
This will prevent overcrowding and root rot and improve its aesthetic appearance.
Ensuring Proper Growth And Health
One of the primary reasons for repotting echeveria plants is to ensure their optimal growth and overall health.
A plant outgrown its pot will struggle to absorb essential nutrients and water, resulting in stunted development or deterioration.
For instance, imagine an overcrowded succulent garden where multiple echeverias compete for space, nutrients, and sunlight.
If you’re a plant lover who wants to keep your indoor houseplants healthy, it’s important to repot your stressed echeverias with a nutrient-rich potting mix.
This will improve their overall health and prevent problems like pests and diseases that can occur when plants are overcrowded.
Preventing Overcrowding And Root Rot
Preventing overcrowding and root rot is crucial to maintaining the health and longevity of your Echeveria plants.
Overcrowded conditions can lead to a lack of proper airflow, making it difficult for water to evaporate from the soil surface, leading to wet soil that increases the risk of developing root rot.
To prevent these problems, repot your Echeveria plant once it has outgrown its previous container or when the roots begin wrapping around themselves (known as being root-bound).
Use a well-draining potting mix that includes cactus soil or other gritty components like perlite or sand, allowing excess water to drain away easily.
Enhancing Aesthetics
Repotting Echeveria plants is crucial for their overall health and growth and significantly enhances their aesthetics.
By selecting the appropriate pot size and soil mix when repotting your echeveria plant, you create an environment that allows it to thrive visually and physically.
A well-drained cactus soil mix and a pot featuring adequate drainage holes can help produce vibrant Echeveria leaves with intense colors.
How to Know When Your Echeveria Plant Needs Repotting
If you see your Echeveria plant becoming overcrowded, with roots outgrowing the pot, leaves turning yellow or wilting, or a slowdown in its growth, it might be time to consider repotting it.
Overcrowding
Overcrowding roots in a small pot is one of the most common reasons Echeveria plants must be repotted.
When the roots become too cramped, they don’t have enough room to grow properly, leading to stunted growth and wilting leaves.
Overcrowding can cause root rot, as moisture gets trapped in overly dense soil and suffocates the roots.
Signs that your Echeveria is overcrowded include visible roots growing out of drainage holes at the bottom of the pot or when you notice that new growth has slowed down significantly.
Root Bound
When Echeveria plants outgrow their pots, they become root-bound.
This means the roots have taken up nearly all the available space in the container.
As a result, the plant may display symptoms such as drooping leaves, discolored stems, and dry topsoil.
Root-bound succulents grow slower and produce fewer blooms than those given more room to grow.
To determine if your plant is root-bound, gently remove it from its pot and examine its roots.
If you notice little or no soil visible around them or they are tightly packed in a ball shape, it’s time for repotting.
Wilting And Yellowing Leaves
If your Echeveria plant’s leaves are yellowing or wilting, it may be a sign that it needs to be repotted.
This can happen when the plant becomes root-bound, and there is not enough room for the roots to spread out and absorb nutrients properly.
When this happens, the older leaves start to die off as they compete with each other for nutrients.
Another possible reason for yellowing and wilting leaves could be overwatering, which can cause the roots to become waterlogged and ultimately rot.
On the other hand, dehydrated plants may also have leaves that turn yellow and mushy due to a lack of moisture in their soil.
Slow Growth
If you’ve noticed that your echeveria plant’s growth has become sluggish, it may be time to repot it.
Slow growth often indicates that the plant has outgrown its current container and needs more space for its roots to spread out.
When the root system becomes too large for the pot, it can act as a barrier and prevent nutrients from reaching the rest of the plant.
Regularly monitoring your Echeveria’s growth rate is essential to avoid this issue.
If you notice slow or halted development, check if your plant is root-bound or overcrowded in its current container.
Repotting into a larger pot with fresh soil allows your echeveria room to grow and access all the essential nutrients required for healthy development.
How To Repot Echeveria Plants
First, choose a suitable pot and soil to repot your Echeveria plant.
Next, carefully remove the plant from its current container and remove the old soil and dead roots.
Finally, transfer the plant to a new pot with fresh soil. Keep reading for additional tips on how to repot your Echeveria plant successfully.
Choosing The Right Pot And Soil
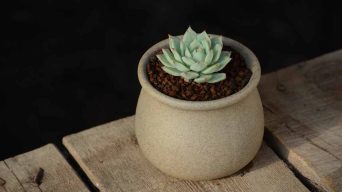
It’s essential to choose the right pot for your Echeveria plant.
A suitable pot should be one size larger than its current container, with a drainage hole at the bottom to prevent waterlogging and root rot.
It’s also best to use a quality soil mix that drains well, such as a ‘Cactus & Succulent’ labeled potting mix.
Moreover, removing the top layer of old soil is recommended if you’re repotting more extensive succulents that are difficult to transfer without harming delicate roots.
Replace it with fresh soil without burying any lower leaves in the new soil.
Preparing The Plant For Repotting
Before you start repotting your Echeveria plant, preparing it for the process is essential.
First, hydrate the plant for at least 24 hours before repotting it by giving it a good drink of water.
Next, remove any dead or damaged leaves from the base of the stem and trim back any excessively long roots if necessary.
Finally, choose a pot one size larger than its current container and ensure adequate drainage by providing holes at the bottom of the new pot.
By following these steps, you’ll help ensure healthy growth and prevent complications such as overwatering or root rot.
Transferring The Echeveria To The New Pot
Remove the Echeveria from its old container when transferring it to a new pot. Gently loosen any roots that may have become tangled or compacted in the soil.
Next, add a layer of fresh succulent potting mix to the bottom of the new pot and place the Echeveria on top, ensuring it is centered and upright.
Finally, gently press down on the soil around the base of your Echeveria to anchor it in place and provide support for new growth.
Be careful not to overwater after repotting, as this can lead to excess moisture, causing root rot.
Allow your newly transplanted Echeveria time to adjust before resuming normal care routines such as watering and fertilizing according to specific needs.
Aftercare And Maintenance
It’s important to take proper care and maintenance to ensure your newly repotted Echeveria thrives.
This includes watering and fertilizing appropriately, preventing transplant shock, providing ideal sun exposure, and pruning or trimming as necessary.
It’s also essential to address any pests or diseases that may arise.
Proper Watering And Fertilizing
Watering and fertilizing are vital aspects of aftercare and maintenance for your repotted Echeveria plant.
Overwatering is one of the most significant risks to these succulents, as it can cause root rot and attract pests like mealybugs.
To avoid this, you should water your Echeveria once every week for ten days, depending on the pot size and plant.
Fertilizer should be applied during the growing season to boost growth and maintain health.
However, be careful not to overfertilize your Echeveria, as too much fertilizer can burn roots or cause nutrient imbalances in the soil.
When growth slows down or stops entirely in winter, reduce irrigation frequency to every three weeks to prevent overwatering during dormancy periods.
Avoiding Transplant Shock
Transplant shock is a common problem that plants can experience after being repotted.
It happens when the plant becomes stressed due to environmental changes, and roots are disturbed during the transplant process.
However, there are several measures you can take to avoid this from happening to your Echeveria plant.
Firstly, make sure that you water your Echeveria thoroughly before moving it to its new pot.
This will help keep the soil intact and ensure the roots do not dry out too much during the transition period.
Regular fertilizers throughout the growing season will help boost your plant’s immune system and reduce recovery time if they suffer from transplant shock.
Ensuring Proper Drainage
Proper drainage is key to maintaining healthy echeveria plants.
This means choosing a pot with drainage holes and using well-draining soil or adding gravel to the bottom of the pot to allow excess water to escape.
To ensure proper drainage, ensure you’re also watering your Echeveria correctly.
Wait until the soil has fully dried out before watering, then thoroughly soak it until water runs freely out of the drainage holes.
Maintaining Ideal Sun Exposure
Echeveria plants thrive in bright sunlight, making it crucial to maintain ideal sun exposure for their growth and health.
When choosing a spot for your Echeveria, look for an area that receives full sun throughout the day.
If you’re growing Echeveria plants indoors, consider placing them near a south-facing window or using grow lights to provide adequate light.
Remember that these plants are not tropical and prefer good regular ventilation mixed with very humid conditions if possible.
If you notice your Echeveria becoming leggy and elongated due to a lack of sunlight, don’t hesitate to trim down any areas where new leaves aren’t forming properly.
Pruning And Trimming
Proper pruning and trimming are essential for the health and success of your Echeveria plants.
When pruning succulents like the Echeveria, removing only old or dying leaves is important to encourage new growth and promote overall plant health.
It’s important to use clean utensils or pruning snips when performing any type of maintenance on your Echeveria plant.
Removing yellow or dying leaves, debris, and dead stem sections can also create a healthier growing environment for your plant.
Pest Control
Pests on Echeveria and succulent plants are rare, but it’s still essential to stay vigilant.
To prevent these pests from taking over your beloved plant, inspect them regularly for signs of damage or insects.
Some remedies include using a mild soap solution to clean the leaves or introducing natural predators such as ladybugs into your garden.
Also, ensure you’re not overwatering, which attracts bugs like fungus gnat larvae that thrive in damp environments.
Common Problems And How To Solve Them
If your Echeveria plant shows signs of overwatering, underwatering, nutrient deficiencies, root rot, pests, and diseases, it’s crucial to act quickly.
You can adjust your watering habits, use the appropriate fertilizers or supplements, remove any affected roots and leaves as needed, and ensure proper drainage and airflow in the potting soil mix.
Overwatering
One of the most common mistakes plant owners make when caring for echeveria plants is overwatering.
These succulents are designed to store water in their leaves and stems, allowing them to survive in arid environments with minimal rainfall.
However, too much water can be detrimental to the health of your Echeveria.
To prevent excessive watering of your Echeveria, it’s crucial to wait until the soil has completely dried before applying water again.
You should also use a well-draining potting mix and a container with adequate drainage holes to prevent excess moisture from accumulating around the roots.
Underwatering
One of the most common problems for echeveria plants is underwatering, which can cause limp and wilted leaves, weak stems, and slow growth.
It’s crucial to water your succulent regularly but avoid overwatering, which can lead to root rot and sudden plant death.
To save an underwatered echeveria plant, it should be watered thoroughly until the soil is soaked and left to drain completely.
You can also mist the leaves occasionally or use a humidity tray to provide moisture in arid climates.
Remember that each plant has unique watering needs depending on its environment, pot size, and growing conditions, so observe your Echeveria closely for signs of dehydration, such as dry soil or crispy leaves.
Nutrient Deficiencies
Proper nutrition is crucial for your echeveria plant’s growth and overall health.
One common problem that succulents, including echeverias, can encounter is nutrient deficiencies.
Nutrient deficiencies occur when a plant lacks one or more essential nutrients required for healthy growth.
Plants’ most common signs of nutrient deficiency are leaf discoloration or distortion.
To avoid nutrient deficiencies, it’s important to ensure that your plant has adequate access to all essential minerals and nutrients.
You can use specialized fertilizers explicitly designed for succulents to provide these nutrients effectively.
Root Rot
Root rot is one of the most common problems affecting Echeveria plants.
It’s usually caused by overwatering and can quickly lead to severe damage or even plant death if left untreated.
In succulents like Echeveria, which have excellent water-storing capacity, excess water in the soil can cause their roots to rot and suffocate.
Signs of succulent root rot include softened yellow stems, stunted growth, and rotting leaves.
Pests And Diseases
Although Echeveria plants are generally hardy and resistant to pests and diseases, it’s still important to be aware of potential problems.
Pests such as fungus gnats, spider mites, or succulent mealybugs can occasionally infest your Echeveria plant.
These pests can be contracted through insects feeding on the plant’s sap leading to bacterial or fungal infections, which might cause rotting leaves or flowers.
In terms of diseases, Echeverias can contract bacterial or fungal infections due to soil issues like overwatering.
Symptoms like yellowed foliage and root/basal rot indicate an issue with too much water in the soil.
On the other hand, a lack of sunlight may cause stems and leaves to elongate and appear lighter in color – being aware of these signs will help you take action early before they develop into more severe problems.
Final Thoughts
Repotting your echeveria plants is crucial to their care routine.
Repotting is just some benefits of ensuring proper growth and health, preventing overcrowding and root rot, and enhancing their aesthetics.
Remember to watch for signs your plant needs to be repotted, such as slow growth or wilting leaves.
When it’s time to repot, choose the right pot and soil mix, prepare your plant properly for transplanting, and take good care of it afterward with proper watering, fertilizing, pruning, and pest control.
Related Content
 Repotting Schefflera Plants (Everything You Need to Know)
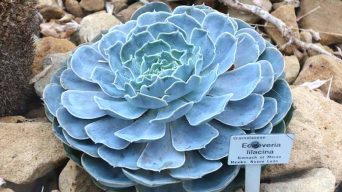 Echeveria Lilacina ‘Ghost Echeveria’ Care and Propagation Guide
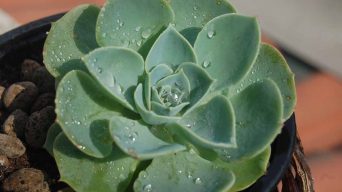 How Often Should You Water Echeveria Plants (An Easy Guide)
 How to Grow and Care for Echeveria Plants (The Ultimate Guide)
 How Much Light Do Echeveria Plants Need for Optimal Growth?
 How To Grow Echeveria Plants From Seeds (A Complete Guide)