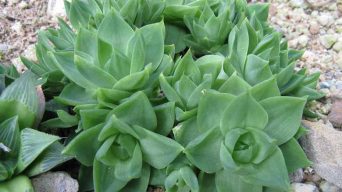
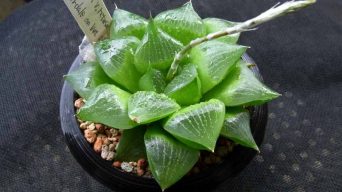
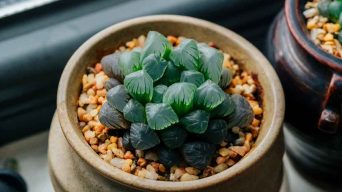
Repotting your haworthia succulent is an essential part of its care routine. It involves changing the soil, refreshing the nutrients, and providing more space for growth.
This process can be intimidating, especially if you are a beginner, but it can be a simple and rewarding experience with the right tools and knowledge.
Knowing when to repot your haworthia is crucial to its health and growth. If you notice that the plant is outgrowing its container, has roots coming out of the drainage holes, or the soil is compacted and dry, it’s time to repot.
The best time to do this is during the active growing season, which is usually in the spring or summer.
Gathering the necessary supplies, such as a new container, fresh soil, gloves, and a trowel, is the first step in successfully repotting your haworthia.
Once you have everything ready, you can start following the steps for repotting.
This article will guide you through the process, common mistakes to avoid, and special considerations for different varieties.
When to Repot Haworthia Succulents
Haworthia is a popular succulent plant that is easy to care for and can thrive in various conditions.
However, like all plants, it needs to be repotted from time to time to continue growing healthily.
Repotting is the process of transferring the plant to a larger pot or replacing the soil to provide the plant with more space and nutrients.
So, when should you repot your Haworthia succulent?
The general rule is to repot your plant every two to three years or when you notice that the plant has outgrown its current container.
Signs that your Haworthia needs repotting include:
- The plant has become too large for its current container.
- The soil is old and depleted, and the plant is not growing as well as it used to.
- The roots are visible on the surface of the soil, or the pot has become too crowded with roots.
It is important to note that Haworthia does not respond well to frequent repotting or root disturbance. Therefore, avoiding repotting your plant too often or unnecessarily is best.
When repotting your Haworthia, using the right soil mix and pot size is essential. Haworthia plants prefer well-draining soil that is slightly acidic and rich in nutrients.
A mixture of cactus soil and perlite or sand is an excellent option for Haworthia plants. The pot should be slightly larger than the current one, allowing enough space for the plant to grow.
In summary, repotting your Haworthia succulent every two to three years or when it outgrows its current container is essential to maintain its health and growth.
Signs that your plant needs repotting include a crowded pot, visible roots, and depleted soil. When repotting, use a well-draining soil mix and a slightly larger pot to ensure the plant has enough space to grow.
Gathering Supplies
Before repotting your haworthia, gathering all the necessary supplies is essential.
This will ensure a smooth and successful repotting process. This section will cover your two main supplies: a container and a potting mix.
Container Choice
When choosing a container for your haworthia, there are a few things to remember.
First, make sure the container has drainage holes. Haworthia, like most succulent plants, are sensitive to overwatering and need well-draining soil.
A container with drainage holes will prevent water from accumulating at the bottom, which can lead to root rot.
Second, choose a container that is slightly larger than the current one. Haworthia plants prefer to be slightly root-bound, so you don’t need to go too big.
A container that is 1-2 inches larger in diameter than the current one should suffice.
Potting Mix
Choosing the right potting mix is crucial for the health of your haworthia.
Haworthia plants prefer a well-draining soil mixture that is slightly acidic.
You can purchase a pre-made succulent or cactus soil mix at your local garden center, or make your own by combining equal parts of sand, perlite, and peat moss.
Before repotting, make sure to have fresh potting mix on hand. Using old or depleted soil can lead to poor growth and health of your haworthia.
It’s also a good idea to sterilize the soil before using it to prevent any potential pests or diseases.
In summary, when gathering supplies for repotting your haworthia, make sure to choose a container with drainage holes and slightly larger than the current one.
Use a well-draining, slightly acidic potting mix that is fresh and sterilized to ensure the health and vitality of your haworthia.
Steps to Successfully Repot Haworthia Succulents
If you’re looking to repot your Haworthia succulent, you’re in the right place.
Repotting is essential to caring for Haworthia plants, as it helps replenish depleted nutrients and prevent root rot.
Here we’ll go over the steps you must take to repot your Haworthia succulent successfully.
Step 1: Preparation
Before you begin repotting your Haworthia, you’ll need to gather a few supplies.
You’ll need a slightly larger pot than the one your Haworthia is currently in, some fresh soil, and a trowel or shovel.
It’s also a good idea to wear gloves to protect your hands from the sharp leaves of the Haworthia.
Step 2: Removing the Plant
The next step is to remove the Haworthia from its current pot carefully.
To do this, gently loosen the soil around the base of the plant with your trowel or shovel.
Once the soil is loose, gently lift the plant out of the pot, being careful not to damage the roots or leaves.
Step 3: Inspecting and Pruning
Once you have removed the plant from its pot, take a moment to inspect the roots and leaves.
If you notice any damaged or dead roots, prune them with a clean pair of scissors or pruning shears.
You should also remove any dead or damaged leaves.
Step 4: Repotting
Now it’s time to repot your Haworthia. Fill the new pot with fresh soil, leaving enough room at the top for the plant.
Place the Haworthia in the new pot, making sure that the roots are covered with soil.
Gently press down on the soil to secure the plant in place.
Step 5: Watering and Settling
After repotting your Haworthia, give it a good watering.
Be careful not to overwater, as Haworthia plants are susceptible to root rot.
Wait until the soil is completely dry before watering again.
Once you’ve watered the plant, give it time to settle into its new pot before moving it to its permanent location.
Step 6: Post-Repot Care
You can do a few things to ensure that your Haworthia thrives after repotting.
First, make sure the plant is getting the right amount of light. Haworthia plants prefer bright light but should be kept out of direct sunlight.
Additionally, make sure the soil is not too wet, as this can lead to root rot.
Finally, be patient. It may take a few weeks for your Haworthia to adjust to its new pot, but it will thrive in its new home with the right care.
In conclusion, repotting your Haworthia is a simple but essential part of caring for this beautiful succulent.
By following these steps, you can ensure that your Haworthia stays healthy and vibrant for years to come.
Common Mistakes to Avoid
When it comes to repotting your Haworthia plant, there are a few common mistakes to avoid to ensure the health and longevity of your plant.
Here are some things to keep in mind:
1. Overwatering
One of the most common mistakes people make when repotting their Haworthia is overwatering.
This can lead to root rot and other problems. Ensure to water your plant only when the soil is dry, and avoid letting it sit in standing water.
2. Using the Wrong Soil
Another mistake to avoid is using the wrong soil. Haworthia plants require well-draining soil to prevent waterlogged roots and root rot.
Make sure to use a soil mix specifically designed for succulents, or create your own mix using sand, perlite, and peat moss.
3. Direct Sunlight
While Haworthia plants prefer bright, indirect sunlight, they should be protected from direct sunlight, as this can cause sunburn and other problems.
If you need to move your plant to a sunnier location, do so gradually to avoid shocking the plant.
4. Repotting Too Often
Finally, avoid repotting your Haworthia too often.
While it’s important to repot your plant when necessary, doing so too often can stress the plant and damage the roots.
When repotting, make sure to use a pot that is only slightly larger than the current one, and avoid disturbing the roots too much.
By avoiding these common mistakes, you can ensure that your Haworthia plant stays healthy and vibrant for years to come.
Dealing with Root-bound Plants
When it comes to Haworthia plants, they generally prefer to stay slightly root-bound.
However, it is crucial to repot them when their roots start coming out of the drainage holes.
If your Haworthia stays root-bound for too long, it will drain water quickly and experience nutrient deficiency, dehydration, and stunted growth.
If you notice that your Haworthia is root-bound, it’s time to repot it.
Here are some steps you can take:
- Choose a pot that is slightly larger than the current one. A pot that is too big can lead to overwatering and root rot.
- Gently remove the plant from the current pot and loosen the soil around the roots. Be careful not to damage the roots.
- Trim any dead or damaged roots with clean shears or a sharp knife.
- Place the plant in the new pot and fill it with fresh potting soil. Make sure to leave enough space for watering.
- Water the plant thoroughly and let it drain before placing it in a bright, indirect light.
When repotting your Haworthia, it’s important to remember the roots’ importance.
The roots are responsible for absorbing water and nutrients, essential for plant growth.
By repotting your Haworthia when it’s root-bound, you are giving it the space it needs to grow and thrive.
In summary, while Haworthias prefer to stay slightly root-bound, it’s crucial to repot them when their roots start coming out of the drainage holes.
By following the steps outlined above, you can successfully repot your
Haworthia and help it grow to its full potential.
Special Considerations for Different Varieties
Regarding repotting Haworthia, there are a few special considerations you should keep in mind, depending on your variety.
Here are some tips to help you repot your Haworthia successfully:
Zebra Plant (Haworthia Fasciata)
The Zebra Plant is a popular variety of Haworthia. It is named for the white stripes on its leaves, resembling a zebra’s stripes.
When repotting a Zebra Plant, being gentle with its roots is important.
These plants have delicate root systems, so you should avoid disturbing them as much as possible.
Use a well-draining soil mix and a pot that is just slightly larger than the plant’s current pot.
Zebra Haworthia (Haworthia Attenuata)
The Zebra Haworthia is another popular variety of Haworthia.
It is similar in appearance to the Zebra Plant, but it has longer leaves that are more pointed.
When repotting a Zebra Haworthia, you should follow the same guidelines as for the Zebra Plant.
Use a well-draining soil mix and a pot that is just slightly larger than the plant’s current pot. Be gentle with its roots to avoid damaging them.
Haworthia Cooperi
Haworthia Cooperi is a small, slow-growing succulent that is native to South Africa. It has thick, fleshy leaves that form a rosette shape.
When repotting a Haworthia Cooperi, you should use a well-draining soil mix and a pot that is just slightly larger than the plant’s current pot.
Be careful not to damage its delicate roots when repotting.
Haworthia Truncata
Haworthia Truncata is a unique variety of Haworthia that has a triangular shape.
It has thick, fleshy leaves that are arranged in a rosette shape.
When repotting a Haworthia Truncata, you should use a well-draining soil mix and a pot that is just slightly larger than the plant’s current pot.
Be careful not to damage its delicate roots when repotting.
Haworthia Limifolia
Haworthia Limifolia is a succulent plant that is native to South Africa.
It has long, narrow leaves that are arranged in a rosette shape.
When repotting a Haworthia Limifolia, you should use a well-draining soil mix and a pot that is just slightly larger than the plant’s current pot.
Be careful not to damage its delicate roots when repotting.
When repotting Haworthia, it’s important to use a well-draining soil mix and a pot that is just slightly larger than the plant’s current pot.
Be gentle with the plant’s roots to avoid damaging them. With these tips, you should be able to repot your Haworthia and keep it healthy and thriving successfully.
Propagating During Repotting
When repotting your haworthia, you can take the opportunity to propagate it and grow more plants.
You can use a few methods to propagate your haworthia, including leaf cuttings and offsets.
If you want to propagate your haworthia through leaf cuttings, you can take a healthy leaf from the mother plant and let it dry for a few days.
Once the leaf has dried, you can plant it in well-draining soil, wait for it to root, and grow into a new plant. Keep the soil moist but not too wet, and make sure the cutting is in a warm and bright location.
Another way to propagate your haworthia is through offsets.
When you repot your haworthia, you may notice small rosettes growing near the base of the plant or along the stem.
You can carefully remove these offsets from the mother plant and plant them in their own pots.
Make sure to use well-draining soil and keep the new plants in a warm and bright location.
Propagation during repotting is a great way to grow your haworthia collection or share plants with friends and family.
With a little patience and care, you can successfully propagate your haworthia and enjoy the beauty of this indoor plant species.
Final Thoughts
Repotting your Haworthia succulents is essential to ensure their health and longevity.
Timing is crucial, and choosing the spring season for repotting is best.
Following the right steps, such as preparing the right soil mix, gently removing the plant from its current pot, and providing proper care after repotting, will greatly increase your chances of success.
Remember to be patient and observe your succulent closely during the repotting process.
With the right timing and steps, you can enjoy thriving and beautiful Haworthia succulents for years to come.

