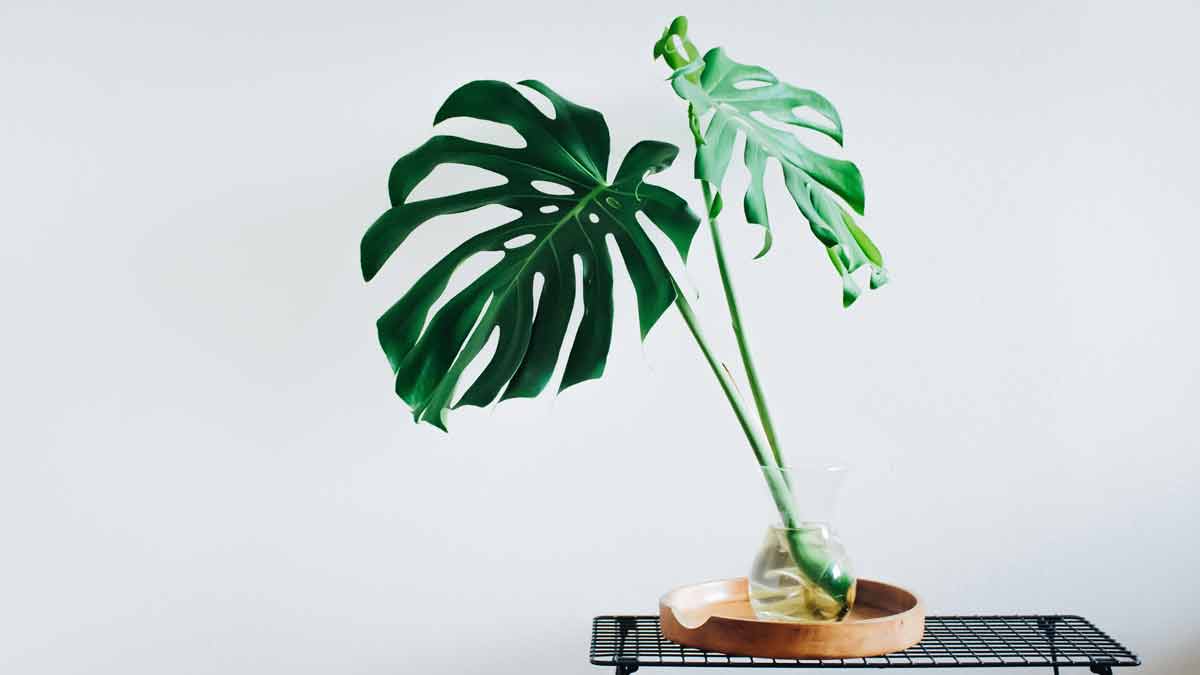
To propagate a Monstera plant in water, find a node on the stem, cut beneath it, and place the cutting in water until roots develop. Change the water every few days, and move the plant to a larger container to avoid becoming root-bound. Tap water is fine, but filtered water is recommended.
Are you looking for a beautiful and unique way to decorate your home?
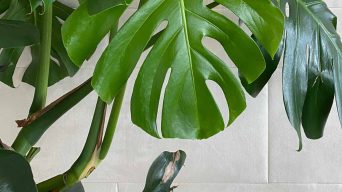
Monstera plants, also known as Swiss cheese plants, are an excellent choice! Not only do they look great, but they’re also very easy to care for.
Best of all, propagating monstera in water is a fun and rewarding activity that anyone can do at home.
This article will show you how to propagate a monstera plant in water with step-by-step instructions.
You’ll be able to watch as your plant grows into a full specimen that makes any room come alive with beauty!
So let’s get started and learn how to propagate monstera in water.
Materials and Tools Needed to Propagate Monstera Plants in Water
To propagate a monstera plant in water, you’ll need the following items:
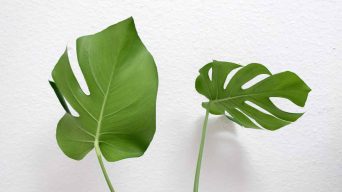
- A monstera cutting: Choose one with at least two nodes (a spot on the stem where a new root or leaf can grow).
- A clean, sharp knife or scissors: This will be used to cut the stem of your monstera cutting.
- Fresh Water: This can be distilled, filtered, or rainwater.
- A glass jar or vase: This will serve as the water vessel for your monstera cutting. A transparent jar or vase will work best, so you can watch as the roots grow.
- Pebbles: Optional, but pebbles can be placed at the bottom of your jar to help keep the stem upright and provide stability for your monstera cutting.
- A pot or planter: This will be used to transfer your monstera plant once the roots have grown. The pot or planter should have drainage holes at the bottom.
- A well-draining soil mix: This will be used to transfer your monstera plant once the roots have grown.
These supplies will help you propagate your monstera in water and ensure that it grows healthy and strong. Now, let’s move on to the actual process of propagating your monstera!
Identifying and Preparing Monstera Cuttings
Propagating Monstera plants is a great way to add more of these beautiful plants to your home. To do this, you will need to identify and prepare the cuttings correctly.
Here are the steps for identifying and preparing monstera cuttings so that they can be propagated in water.
Finding the Node on a Stem
The first step in propagating monstera is finding the node on a stem.
The node is where new leaves will grow from, so it’s important to find it before snipping the stem.
To find the node, look for a small bump or indentation along the stem. This is where you should make your cut when snipping off the cutting.
Snipping the Stem
Once you have identified the node, you can snip off the cutting with a sharp knife or shears.
Make sure that your knife or shears are clean so that you don’t introduce any bacteria into your plant.
When snipping off your cutting, make sure that it has at least two nodes and some roots attached.
Trimming the Leaves
After snipping off your cutting, you may want to trim some of its leaves if they are too large or too many.
This will help ensure that all of its energy goes towards growing new roots instead of maintaining its existing leaves.
When trimming leaves, make sure to use clean scissors or shears and avoid leaving any jagged edges, which could cause infection in your plant.
You should take these steps to identify and prepare your monstera stem cutting before propagating it in water.
Now, let’s move on to the actual process of propagating your monstera in water!
Propagating Monstera Cuttings in Water
Growing a monstera from a cutting is a rewarding experience and is relatively easy if you follow the correct steps.
Here are the steps for propagating monstera cuttings in water:
1. Choosing the Right Container and Water
Choose a clean container to hold your monstera cutting. It should be big enough for the stem and roots but not so large that changing out the water is difficult.
The container should also be deep enough for the roots to grow freely.
You can also add pebbles or aquarium rocks at the bottom of the jar to provide stability for your cutting.
When selecting water, make sure to use filtered or distilled water as tap water contains chlorine which can damage the roots of your cutting.
2. Positioning the Cutting in Water
Once you have chosen your container and filled it with filtered or distilled water, you are ready to place your cutting into the container.
Make sure that you submerge both the node (the part of the stem where leaves will eventually emerge) and any aerial roots (roots that grow out from the stem).
If there are any old sheaths on the stems of your leaves, make sure to pull them off before placing them into the water, as they may rot when submerged.
If you’re using pebbles or rocks, make sure that the cutting is positioned so that the stem and roots are resting on top of them.
This will ensure that your cutting is stable in the jar and won’t fall over when it starts to grow new roots.
3. Changing the Water and Monitoring the Cutting
You will need to change the water every few days to prevent bacteria and fungi growth. To do this, simply dump out the old water and replace it with fresh water.
This will ensure that the environment is clean and healthy for your cutting while it grows new roots.
When changing out the water, make sure to use filtered or distilled water again.
It’s also important to monitor your monstera cutting for any signs of stress, such as wilting leaves or stems that are turning brown.
If you see any of these signs, trim off any affected leaves or stems and continue monitoring your plant for any further signs of distress.
4. Timeframe for Root Development
It can take anywhere from four to six weeks for your monstera cutting to grow roots. During this time, ensure you’re keeping a close eye on it and regularly changing out the water.
When propagating a Monstera cutting in water, it’s important to be patient and wait for the roots to develop.
You can tell when the cutting is ready to be transplanted into the soil when it has thick, strong roots that don’t look fragile or brittle. They will also look white or light green in color.
Once the roots have developed, you can then transplant your monstera cutting into potting soil.
Transplanting Monstera Cuttings from Water to Soil
Once your monstera cutting has developed a strong root system, you can transplant it from water to potting soil.
Here are some tips on how to successfully transplant your Monstera cutting from water to soil.
Preparing the Soil Mixture
The first step in transplanting your Monstera cutting is preparing the soil mixture.
You’ll want to use a well-draining potting mix that contains organic matter such as peat moss or compost.
Make sure that the pH of the soil is between 5.5-6, as this will ensure optimal growth for your plant.
Transplanting the Rooted Cutting
Once you have prepared your soil mixture, it’s time to transplant your rooted cutting into it.
Fill the bottom of the pot with one to two inches (2.5 – 5 cm) of your potting mix and place the cutting in it, making sure that it is firmly planted in the soil.
Gently pat down around the base of the plant and water thoroughly until excess moisture begins to drain out of the bottom of the pot.
It’s important to ensure that the soil remains moist but not waterlogged throughout the process.
Caring for Newly Transplanted Monstera Cuttings
Now that you’ve transplanted your Monstera cutting into soil, you’ll need to provide proper care for it so that it can continue growing and thriving.
Make sure to keep an eye on its watering needs; allow the top inch or two of soil to dry out before watering again, as overwatering a Monstera plant can lead to root rot or other issues with your plant’s health.
Additionally, ensure that you provide adequate light for your plant; indirect sunlight is best for Monsteras, so try placing yours near an east- or west-facing window.
You also need to place your Monstera in an area with good air circulation, as this will help prevent issues such as fungal and bacterial diseases.
With proper care, your Monstera should grow into a lush, healthy plant that you can enjoy for years to come!
Tips for Successful Monstera Propagation in Water
To ensure the successful water propagation of your monstera, you’ll want to pay attention to a few key tips.
- Start with a healthy monstera plant. Make sure the stem you are using for propagation is not damaged and it is free from pests or diseases.
- Cut the stem at an angle to increase the surface area for rooting. Use sharp scissors or pruners so that you get a clean cut.
- Remove all leaves except the top two from the cutting before placing it into water.
- Keep your propagating vessel in an area where it will get indirect sunlight because too much direct light can cause algae growth inside the container.
- Change out the water every few days to keep bacteria levels low and oxygen high, as this encourages better root development.
- Roots should start forming within a couple of weeks. Once they do, pot the cuttings in soil and keep them in a humid environment with indirect light until the plant is fully established.
- Keep your cutting away from drafts or cold air conditioning vents as this can cause stress and slow down root growth.
- Patience! Water propagation takes time and can take several months for a fully established cutting.
Following these simple tips will help ensure the successful propagation of your monstera in water. With patience, you’ll be rewarded with beautiful new indoor plants!
Common Mistakes to Avoid
When growing monstera in water, some common mistakes can lead to unsuccessful propagation.
Here are some tips to avoid:
- Don’t place the cutting in direct sunlight. Too much light can cause the water to overheat, and your cutting won’t root properly.
- Don’t let the water become stagnant, as this will encourage bacteria growth and make it difficult for your cutting to survive.
- Avoid using tap water with high mineral content, as this can damage the delicate cells of your cutting.
- Don’t place your cutting in a too shallow or deep container. The water should come up to just below the nodes of the cutting and not cover its leaves.
- Keep in mind that propagating Monsteras can be a slow process, so don’t rush it! Take your time and follow the tips above for successful propagation results. Good luck!
- Don’t forget to change out the water regularly and check on your cutting daily. It’s always best to keep an eye on the progress of your propagation journey!
- Don’t move the cutting until it has established roots and is ready to be potted in soil, as this can cause it to dry out.
- Keep your cutting away from cold or drafty areas, as this will most likely slow down the rooting process.
By following these helpful tips and avoiding common mistakes, you’ll have a much better chance of propagating monstera successfully!
Final Thoughts
Propagating a Monstera, the swiss cheese plant, in water is a great way to start your own plant family at home. It’s simple and fun; you get to watch your new plants develop roots as they grow!
To succeed with this method, make sure you use clean water that’s not too hot or cold, change it frequently, and be patient.
With the right conditions, your Monstera propagation will soon come to life!
Related Content
 How to Split a Monstera Plant: A Step-by-Step Guide
 How to Propagate Rubber Plants in Water: Step-by-Step Guide
 How to Propagate Monstera from Cuttings (A Complete Guide)
 Monstera Air Layering: A Better Way to Propagate Your Plant
 How Often Should You Water a Monstera Plant (A Complete Guide)
 How To Bottom Water Monstera Plants (A Complete Guide)