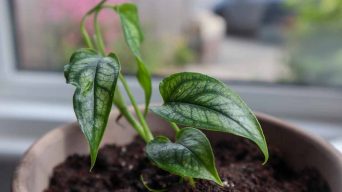
Monstera adansonii can be propagated in water, soil, sphagnum moss, or perlite. Take a stem cutting with at least one node and leaf, root it in water or soil, and keep it in bright, indirect light. Propagation helps create new plants and expand your collection.
Growing your own Monstera Adansonii is a great way to bring the beauty of nature into your home.
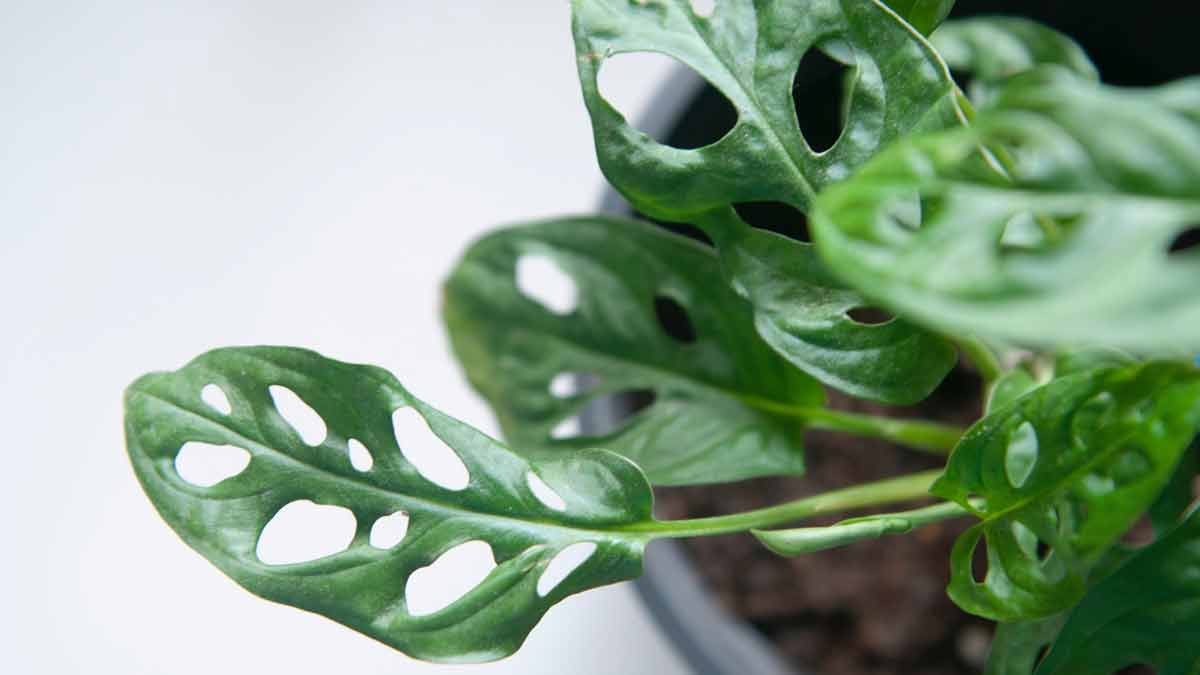
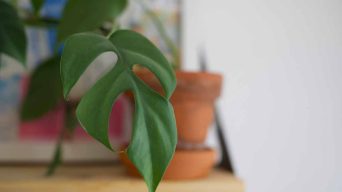
This popular tropical plant, also known as the Swiss Cheese Plant or Mexican Breadfruit, is easy to care for and can be propagated in several ways.
Propagation allows you to produce more plants from one parent plant easily, and it’s a great way to add variety to your home decor.
In this article, we’ll discuss how you can propagate Monstera adansonii and provide tips on getting started with this rewarding process.
Monstera Adansonii Propagation Methods
There are several ways to propagate Monstera Adansonii.
Each method can be used to create a new Monstera adansonii plant from the mother plant.
Let’s take a look at the most popular methods.
Water Propagation
Propagating Monstera plants through water is considered one of the simplest techniques.
To propagate your Monstera adansonii in water, you will need clean scissors, a glass jar or container, some lukewarm water, and the desired plant parts.
How To Propagate Monstera Adansonii in Water
Look for a stem with at least one node and one or two leaves. Make a clean cut about 1/4 inch below the node using your scissors.
Next, it’s time to root your cutting in water.
Fill a glass or jar with clean water and place your cutting.
Ensure the node is submerged in the water while the leaves are above it. You can also add some rooting hormone to encourage faster root growth.
Now comes the waiting game. Your cutting should start developing roots within a few weeks. Monitor the water level and change it every few days to prevent bacteria growth.
Once your cutting has developed a good root system, it’s time to transfer it to the soil.
Choose a pot with well-draining soil and make a small hole in the center.
Gently place your cutting into the hole and cover it with soil, ensuring not to bury the leaves.
Water your newly potted Monstera adansonii thoroughly and place it in a bright spot with indirect sunlight. Avoid direct sunlight, as this can burn the leaves.
Soil Propagation
Propagating Monstera adansonii in the soil is another popular option.
Rooting Monstera cuttings in soil is akin to water propagation but has a slightly longer process. It entails obtaining cuttings from a thriving plant and establishing roots in the soil.
It’s a simple process that can yield great results with a little patience.
How To Propagate Monstera Adansonii in Soil
First, you’ll need to gather your supplies. You’ll need a healthy Monstera adansonii plant, a clean pair of pruning shears, a small container filled with well-draining soil, and some water.
To take cuttings, look for a stem with at least one node – this is where the roots will grow from.
Use your pruning shears to make a clean cut just below the node. You can take multiple cuttings if you’d like to propagate several new plants.
Next, remove any leaves from the lower part of the cutting – these can be planted separately to create new plants.
Dip the cut end of the stem into rooting hormone powder if desired – this can help encourage root growth.
Now it’s time to plant your cuttings in soil.
Make a small hole in the soil with your finger or a pencil and gently insert the cutting, ensuring the node is covered with soil.
Water thoroughly and place in a warm, bright location from direct sunlight.
It may take several weeks or even months for your cuttings to develop roots and grow new leaves.
Be patient and avoid disturbing the soil during this time – you want to give your new plants the best chance to establish themselves.
Once your Monstera adansonii cuttings have rooted and are growing well, you can transplant them into larger pots or even share them with friends who are also plant enthusiasts.
Sphagnum Moss and Perlite Propagation
Monstera adansonii can also be propagated using sphagnum moss and perlite.
This method is ideal for those who don’t have access to soil or would like an easier way to keep track of their cuttings.
How To Propagate Monstera Adansonii Using Sphagnum Moss and Perlite
The first step in propagating your monstera adansonii is taking cuttings.
You want to make sure that you take healthy cuttings from the plant. Look for stems that have at least one node – this is where the roots will grow from.
Make a clean cut just below the node using pruning shears or scissors. You can take multiple cuttings if you want to create more than one new plant.
Once you have your cuttings, it’s time to root them in the sphagnum moss and perlite mix.
First, wet the sphagnum moss and mix it with perlite in a 1:1 ratio. This will create a light and airy mix that will help your cuttings root.
Next, place your cuttings into the mix to cover the nodes. Gently press down on the mix around each cutting to ensure good contact between the cutting and the mix.
Now, it’s time to create a humid environment for your cuttings. You can do this by placing them in plastic bags or containers.
Ensure some air circulation is inside – you don’t want them to get too humid and start rotting.
Place your cuttings in a bright spot but out of direct sunlight.
Check on them every few days and mist them if they start looking dry.
After a few weeks, you should start seeing roots growing from the nodes of your cuttings.
Once they have developed a good root system, you can transplant them into their pots with fresh soil.
Air Layering Propagation
Air layering is a great way to propagate Monstera adansonii without taking cuttings.
It’s a bit more complicated than the other methods, but it can be done successfully if you follow the right steps.
For air layering, you’ll need a sharp knife or pruning shears, sphagnum moss (dampened), plastic wrap or a plastic bag, and twine or twist ties.
Ensure your knife or pruning shears are clean and sterilized to prevent potential infections.
How to Propagate Monstera Adansonii Using Air Layering
The first step in air layering is to choose a healthy stem on your monstera adansonii that is at least 1/4 inch thick and has several leaves attached.
Make a small cut about 1 inch long on the stem, just below a node where leaves emerge. Be careful not to cut through the stem.
Gently peel back the bark on either side of the cut until you see the white inner tissue of the stem. This is where roots will form. Take a handful of dampened sphagnum moss and wrap it around the exposed area of the stem.
Cover this with plastic wrap or a plastic bag and secure it in place with twine or twist ties.
Make sure to keep the moss damp by misting it regularly with water.
After about 4-6 weeks, check for root growth by gently tugging on the moss.
If there is resistance, roots have formed! Once roots have formed, carefully remove the plastic wrap and moss from around the stem.
Now it’s time to transfer your new plant to the soil.
Remove any remaining moss around the roots and carefully separate them from the mother plant using clean scissors or pruning shears.
Plant your new monstera adansonii in well-draining soil in a pot slightly larger than its root ball.
Water thoroughly after planting and place it in bright, indirect light until it becomes established in its new home.
Air layering may take longer than other propagation methods, but it can be a fun and rewarding way to grow new plants from existing ones without purchasing additional plants or equipment.
Propagation by Division
Division propagation is a technique to create new plants by separating the parent plant into two or more parts.
The best time to divide Monstera adansonii is during the spring or summer when the plant is actively growing.
It’s important to wait until the plant has reached maturity before dividing it.
A mature Monstera adansonii will have several stems and leaves, indicating that it has established a strong root system.
How to Divide Monstera Adansonii
Before splitting your Monstera adansonii, you must prepare the necessary tools and materials.
You’ll need a sharp, clean knife or pair of scissors, a clean pot with drainage holes, fresh potting soil, and some water.
To divide your monstera adansonii, follow these steps:
- Remove the Plant from its Pot: Carefully remove your Monstera adansonii from its pot and gently shake off any excess soil from its roots.
- Inspect the Roots: Examine your plant’s roots for any signs of damage or disease. If you notice any brown or black spots on the roots, trim them with scissors or a knife.
- Divide the Plant: Look for natural divisions in your Monstera adansonii where stems emerge from the main stem. Use your knife or scissors to cut through these divisions carefully.
- Repot Each Division: Once you’ve divided your plant into separate sections, repot each section in its own clean pot filled with fresh potting soil.
- Water Your New Plants: After repotting each division of your Monstera adansonii, give them a good watering to establish themselves in their new pots.
- Care for Your New Plants: Place each new plant in an area with bright indirect sunlight and keep them moist but not waterlogged. Over time, they will grow into healthy and beautiful plants!
Care Tips for Propagated Monstera Adansonii
Once you’ve successfully propagated your Monstera adansonii, there are a few care tips to remember.
Soil Requirements
The type of soil you use for your propagated Monstera Adansonii is crucial. It needs to be well-draining and rich in nutrients.
A good potting mix would be one part peat moss, one part perlite or vermiculite, and one part potting soil. This will provide the right balance of moisture retention and drainage.
Before planting your cutting in the potting mix, ensure it’s moist but not waterlogged.
You can also add some rooting hormone powder to encourage root growth.
Watering Requirements
When it comes to watering your propagated Monstera Adansonii, less is more.
Overwatering can lead to root rot and other issues. Water only when the top inch of soil feels dry to the touch.
When you do water, ensure you give enough water to reach the roots, but don’t leave any standing water in the pot. It’s better to be underwater than overwater.
Light Requirements
Monstera Adansonii thrives in bright, indirect light.
Place your propagated plant near a window with plenty of natural light, but avoid direct sunlight as it can scorch the leaves.
If you notice your plant isn’t getting enough light, consider using a grow light or moving it closer to a brighter window.
Fertilization
Fertilizing your propagated Monstera Adansonii is essential for healthy growth and vibrant foliage.
Use a balanced fertilizer with equal parts nitrogen, phosphorus, and potassium every two weeks during the growing season (spring through summer).
During fall and winter months, when growth slows down, reduce fertilization frequency to once a month or stop altogether until spring returns.
Pruning
Pruning is important to caring for your propagated Monstera Adansonii as it promotes new growth and keeps the plant healthy and bushy.
Feel free to trim any overgrown Monstera stems or eliminate yellow or damaged leaves using sterile scissors or pruning shears.
Make sure you sterilize them with rubbing alcohol before use to prevent any infections from spreading.
Common Problems and Solutions
Although Monstera adansonii is a hardy plant, there are a few common issues that can hinder its growth and propagation.
Root Rot
Root rot is one of the most common problems faced by Monstera adansonii plants during propagation.
It occurs when the plant’s roots are exposed to too much moisture for an extended period. This can cause the roots to become mushy and eventually die.
Causes of Root Rot
- Excessive watering
- Poor drainage
- Using soil that retains too much moisture
Prevention and Treatment
To prevent root rot in your Monstera adansonii plant, make sure to:
- Water your plant only when the top inch of soil is dry.
- Use well-draining soil.
- Ensure that your pot has proper drainage holes.
- If your plant has already developed root rot, follow these steps:
- Remove the affected parts of the plant.
- Repot your plant in fresh soil with good drainage.
- Reduce watering frequency until the roots have healed.
Overwatering
Overwatering is another common problem faced during Monstera propagation.
It occurs when the plant receives more water than it needs, leading to waterlogged soil and root rot.
Signs of Overwatering
- Yellowing leaves
- Wilting leaves
- Mushy stems or roots
Solutions to Overwatering
To solve overwatering issues in your Monstera adansonii plant, try these tips:
- Water your plant only when the top inch of soil is dry.
- Ensure that your pot has proper drainage holes.
- Use well-draining potting soil.
- If you notice signs of overwatering in your plant, reduce the watering frequency until it recovers.
Underwatering
Underwatering is another problem faced by Monstera adansonii plants during propagation.
It occurs when the plant does not receive enough water to sustain its growth.
Signs of Underwatering
- Dry or crispy leaves
- Drooping leaves
- Slow growth
Solutions to Underwatering
To solve underwatering issues in your Monstera plant, try these tips:
- Water your plant regularly but do not overdo it.
- Check if there are any drainage issues with your pot or soil.
- If you notice signs of underwatering in your plant, increase the watering frequency until it recovers.
Pests
Pests are another common problem faced by Monstera adansonii plants during propagation.
They can damage or kill the new growth on your plants if left untreated.
Common Pests
Some common pests that affect Monstera adansonii plants include:
- Spider mites
- Mealybugs
- Scale insects
- Whiteflies
Prevention and Treatment
To prevent pests from attacking your Monstera adansonii plants during propagation, try these tips:
- Inspect new cuttings for pests before propagating them.
- Keep a close eye on new growth for signs of infestation.
- If you notice any pests on your plants during propagation, try these treatments:
- Isolate infected plants from healthy ones to prevent spreading.
- Use insecticidal soap or neem oil spray to treat the affected areas.
- Regularly check and clean up any fallen leaves or debris from the potting soil.
Final Thoughts
Monstera adansonii propagation is an easy and rewarding process that can bring many benefits.
Not only will you have a beautiful, lush indoor plant, but you may also have additional plants to share with friends and family.
If you’re looking for a project that won’t take too much time or money, propagating the Swiss cheese vine might be a perfect choice.
With minimal effort, you can end up with an impressive collection of lovely plants that will bring life and energy to your home.
So why not give it a try? The results might surprise you!
Related Content
 How to Make Your Monstera Grow Faster: Top Tips & Techniques
 How to Grow Bigger Monstera Leaves: Plant Care Tips & Tricks
 How Fast Do Monstera Grow Indoors? Discover Their Growth Rate
 Monstera Siltepecana Care: The Silver Monstera Growing Guide
 Monstera Minima Propagation Guide (Easy Steps for Success)
 Do Monstera Plants Like Humidity? (Ideal Levels and Tips)